Showing posts with label Game Report / AAR. Show all posts

Wednesday, 23 November 2022

First 1/700 WW2 Test Game & Bismark Updates


I've been slowly building up some 1/700 WW2 Naval Ships from plastic kits over the last few months and a couple of weeks ago I took them down the Leeds Wargames Club to give them a run out.

I am fortunate to have a 12 x 6 table at home but that isn't big enough for these ships so I  set up a 12 x 8 table at the club to run a test game with the ships I have. We use an established set of WW2 Naval rules which I wrote 25 plus years ago, they were adapted for our WW1 games as well so everyone is familiar with the mechanisms so it's absolutely pointless to change them.

However I do need to examine the move distances and gun ranges to move them up in scale from our 1/3000 WW2 games and our 1/2400 WW1 games. I am not looking for an exact model scale to ground scale that would need a huge expanse, however neither am I definitely not looking to go down the Warlord Games route and get the whole of Midway on a 6 x 4.

I'm looking for a happy medium, something that is playable on a table I can manage (which is very Big) which looks right without prescribing to a precise mathematical formula. If I can make a 8 ship Destroyer Action work on a 12 x 8 I'm in the right ballpark for a large ship Action on say a 36 ft table.


So the British started the game with 2 O class Destroyers, HMS Onslow and HMS Obedient (with the 4"QF Guns) pictured above.


Along with 2 E Class Destroyers, HMS Echo and HMS Electra (pictured above)


The Germans had 4 Destroyers Z31, Z32, Z33 and Z37, much larger than the British Destroyers they are also armed with 5.9" Guns, a couple of the ships have 5 Guns with a double turret at the front, the others 4.

These ships are more than a match for the British ones so we decided to only use 3 of the 4 ships and just move the 4th ship around as a dummy so it looked good. In true Yarkshire Gamer style we forgot we weren't using the 4th German Destroyer straight away and the British were in for it from the start.

For this test I was using a movement scale of half an inch per knot (from half a cm per knot for the 1/3000 ships) and had exchanged cms for inches on our firing charts which gave the British Destroyers a range of around a metre (in French Money) and the Germans slightly longer.


Things got hot pretty quickly as the ranges closed quicker than I had expected. If you look closely at the Splash Markers you can see small colour coded numbers, these are to enable us to remember which ship fired at which ship. In the WW1 games I have built shell splashes for each ship however these more scenic ones for the larger scale WW2 games are much more time consuming to produce so I have decided to number these and allocate them to a ship on a game by game basis in steady.


One of the joys of Naval Gaming to me is the randomness of the damage, you can plug away at a ship for move after move and hit nothing critical, smashing up a few boats or scaring the ships cat, or you can get luck with your first hit and damage something a bit more important, HMS Echo suffered damage to her rudder on turn 2 forcing her closer to the approaching German ships.


But it wasn't all one way traffic as a direct hit on one of the Torpedo Tubes on the deck of Z37 started a fire.


The next turn got a lot worse for Echo, stuck on a set course she was an easy target for the Germans and a number of hits caused extensive damage to the Bridge of the ship, whilst other hits caused a fire. To make matters worse attempts to repair the rudder failed.


It was going so well for the Germans until the Commander of Z31 got it all wrong. We write down our moves in secret at the start of each turn on the rear of each ship card, there was a slight miscalculation on the part of the Kriegsmarine and the words "Starboard 8, forward, oh f#*k" were clearly heard as Z31 slammed into the Port side of Z37 causing uncontrollable flooding in the latter ship.


In the end the British lost both E Class Destroyers to repeated hits from the Germans whilst the Germans lost Z37 through poor driving skills !

One O class and Z31 were badly damaged but a clear if not unexpected victory for the Germans.


So on reflection, the rules were fine, I know they work, that wasn't in doubt we have used them for that long. We didn't use Torpedoes in the game solely because I have not made any markers for them yet, and to do that I need to settle on a movement scale. The one thing we did find is that the ships felt as if they were moving too quickly and ranges closing extremely rapidly. 

I will return in a few weeks and try a second play test this time using 1/3 inch per knot and see how that works. Remember I am looking for the right feel to the game not the exact scale conversion.

In addition I've added a couple of videos to the build the Bismark series


Until next time, Sithee 

Regards Ken 
The Yarkshire Gamer 

Thursday, 17 November 2022

The Relief (or not) of the Siege of Forli - An Italian Wars Game


Regular readers will know that it was my plan to debut my Garibaldi Project, Battle of Mentana game at FIASCO this year. Sadly I haven't been able to get the French Infantry Battalions I need for the game as I wait for the Perrys to release their FPW French Plastic Box set.

So I had a 12 x 6 table booked at FIASCO with nothing to put on it, the easiest thing to draw the crowds is the Italian Wars so I put together a game on short notice with the Fornovo game collection and a few extras. There was no time to sculpt terrain or build bespoke buildings, this is what you would get if you gamed at my house.

The scenario is a very loose one, Cesare Borgia was commanding a French / Swiss / Papal force in northern Italy in the late 1490s, he laid seige (twice) to Forli a walled town containing one Caterina Sforza who was the Countess of Flori and daughter of the Duke of Milan.

In 1499 Cesare met up French forces outside Forli and after a short Siege he entered the town and Captured Caterina. This game is based on a what if, that being Caterina Sforza persuading other Italian States and hiring German Mercenarys to break the seige with a pitched battle outside the walls.

The Table

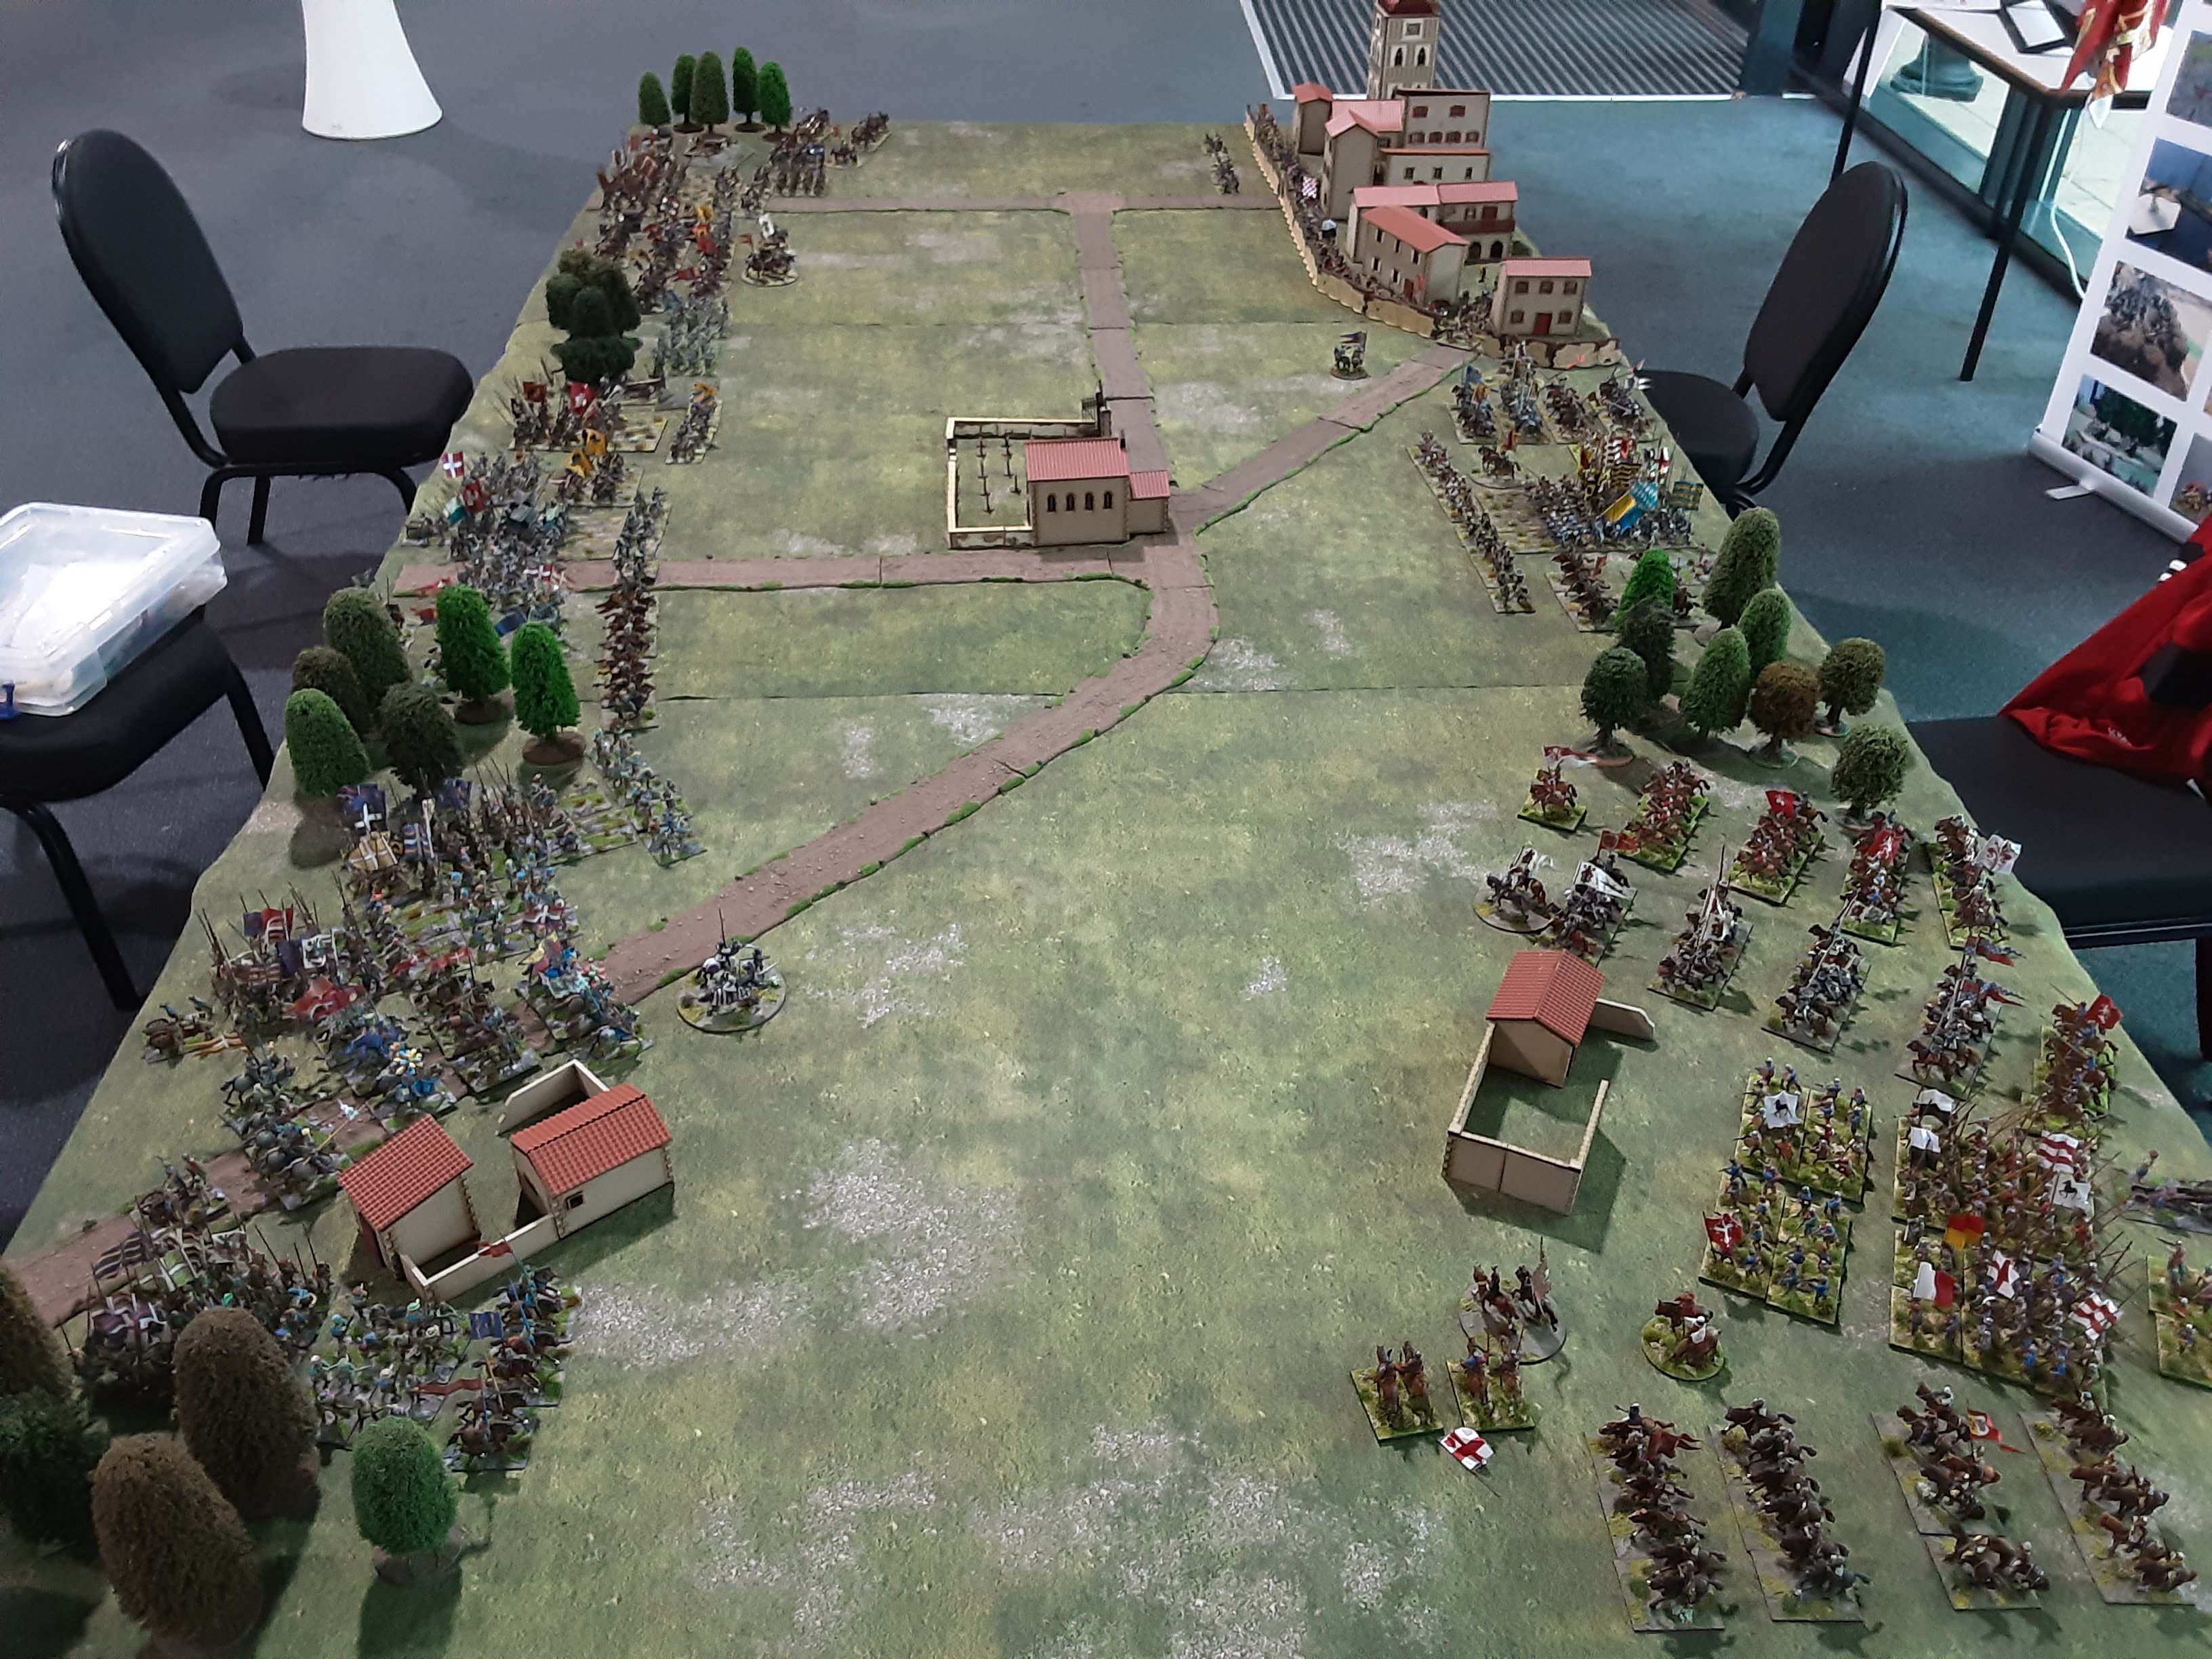
The table itself was my standard 12 x 6 table with a basic terrain layout, with just under 1,500 figures on the table I wanted plenty of room to move.

The Papal Forces are set up on the right (as viewed) of the table and the Sforza Forces on the left.

There is a basic road layout on the table and along the Papal edge there are three woods effectively to split up the three commands of the Papal forces.

The Sfoza side of the table had a large walled town representing Forli covering the first part of the table followed by a couple of randomn woods.

There were two small farms on the far end of the table and a walled Cemetery which of course was the Dead Centre of the table.

The Papal Forces


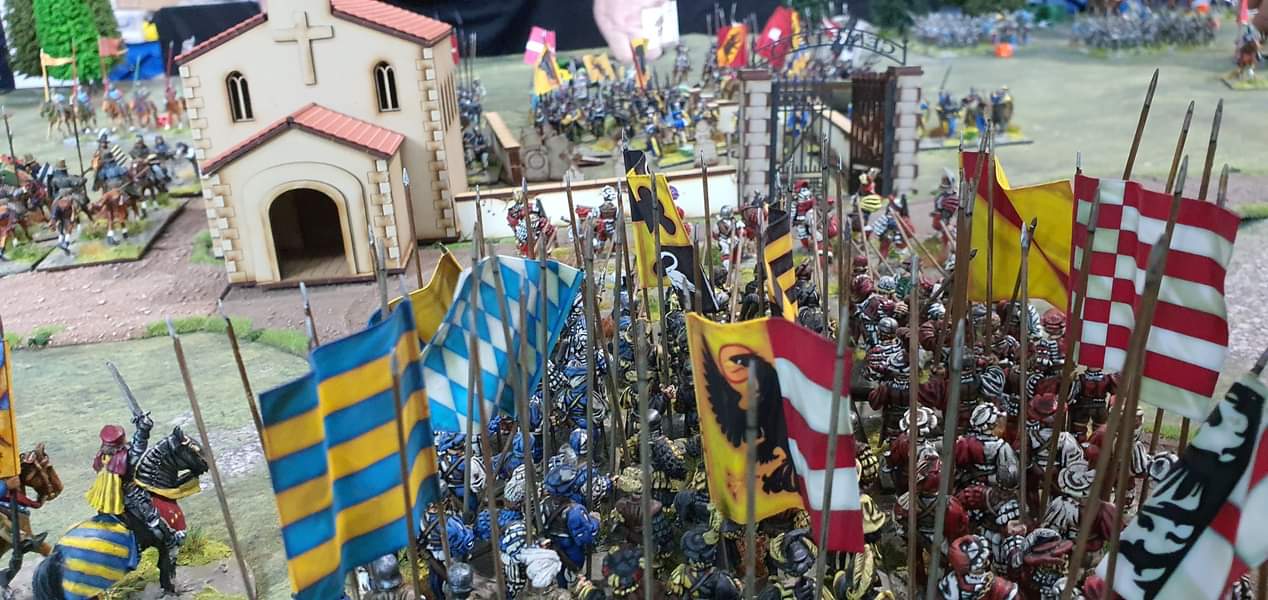
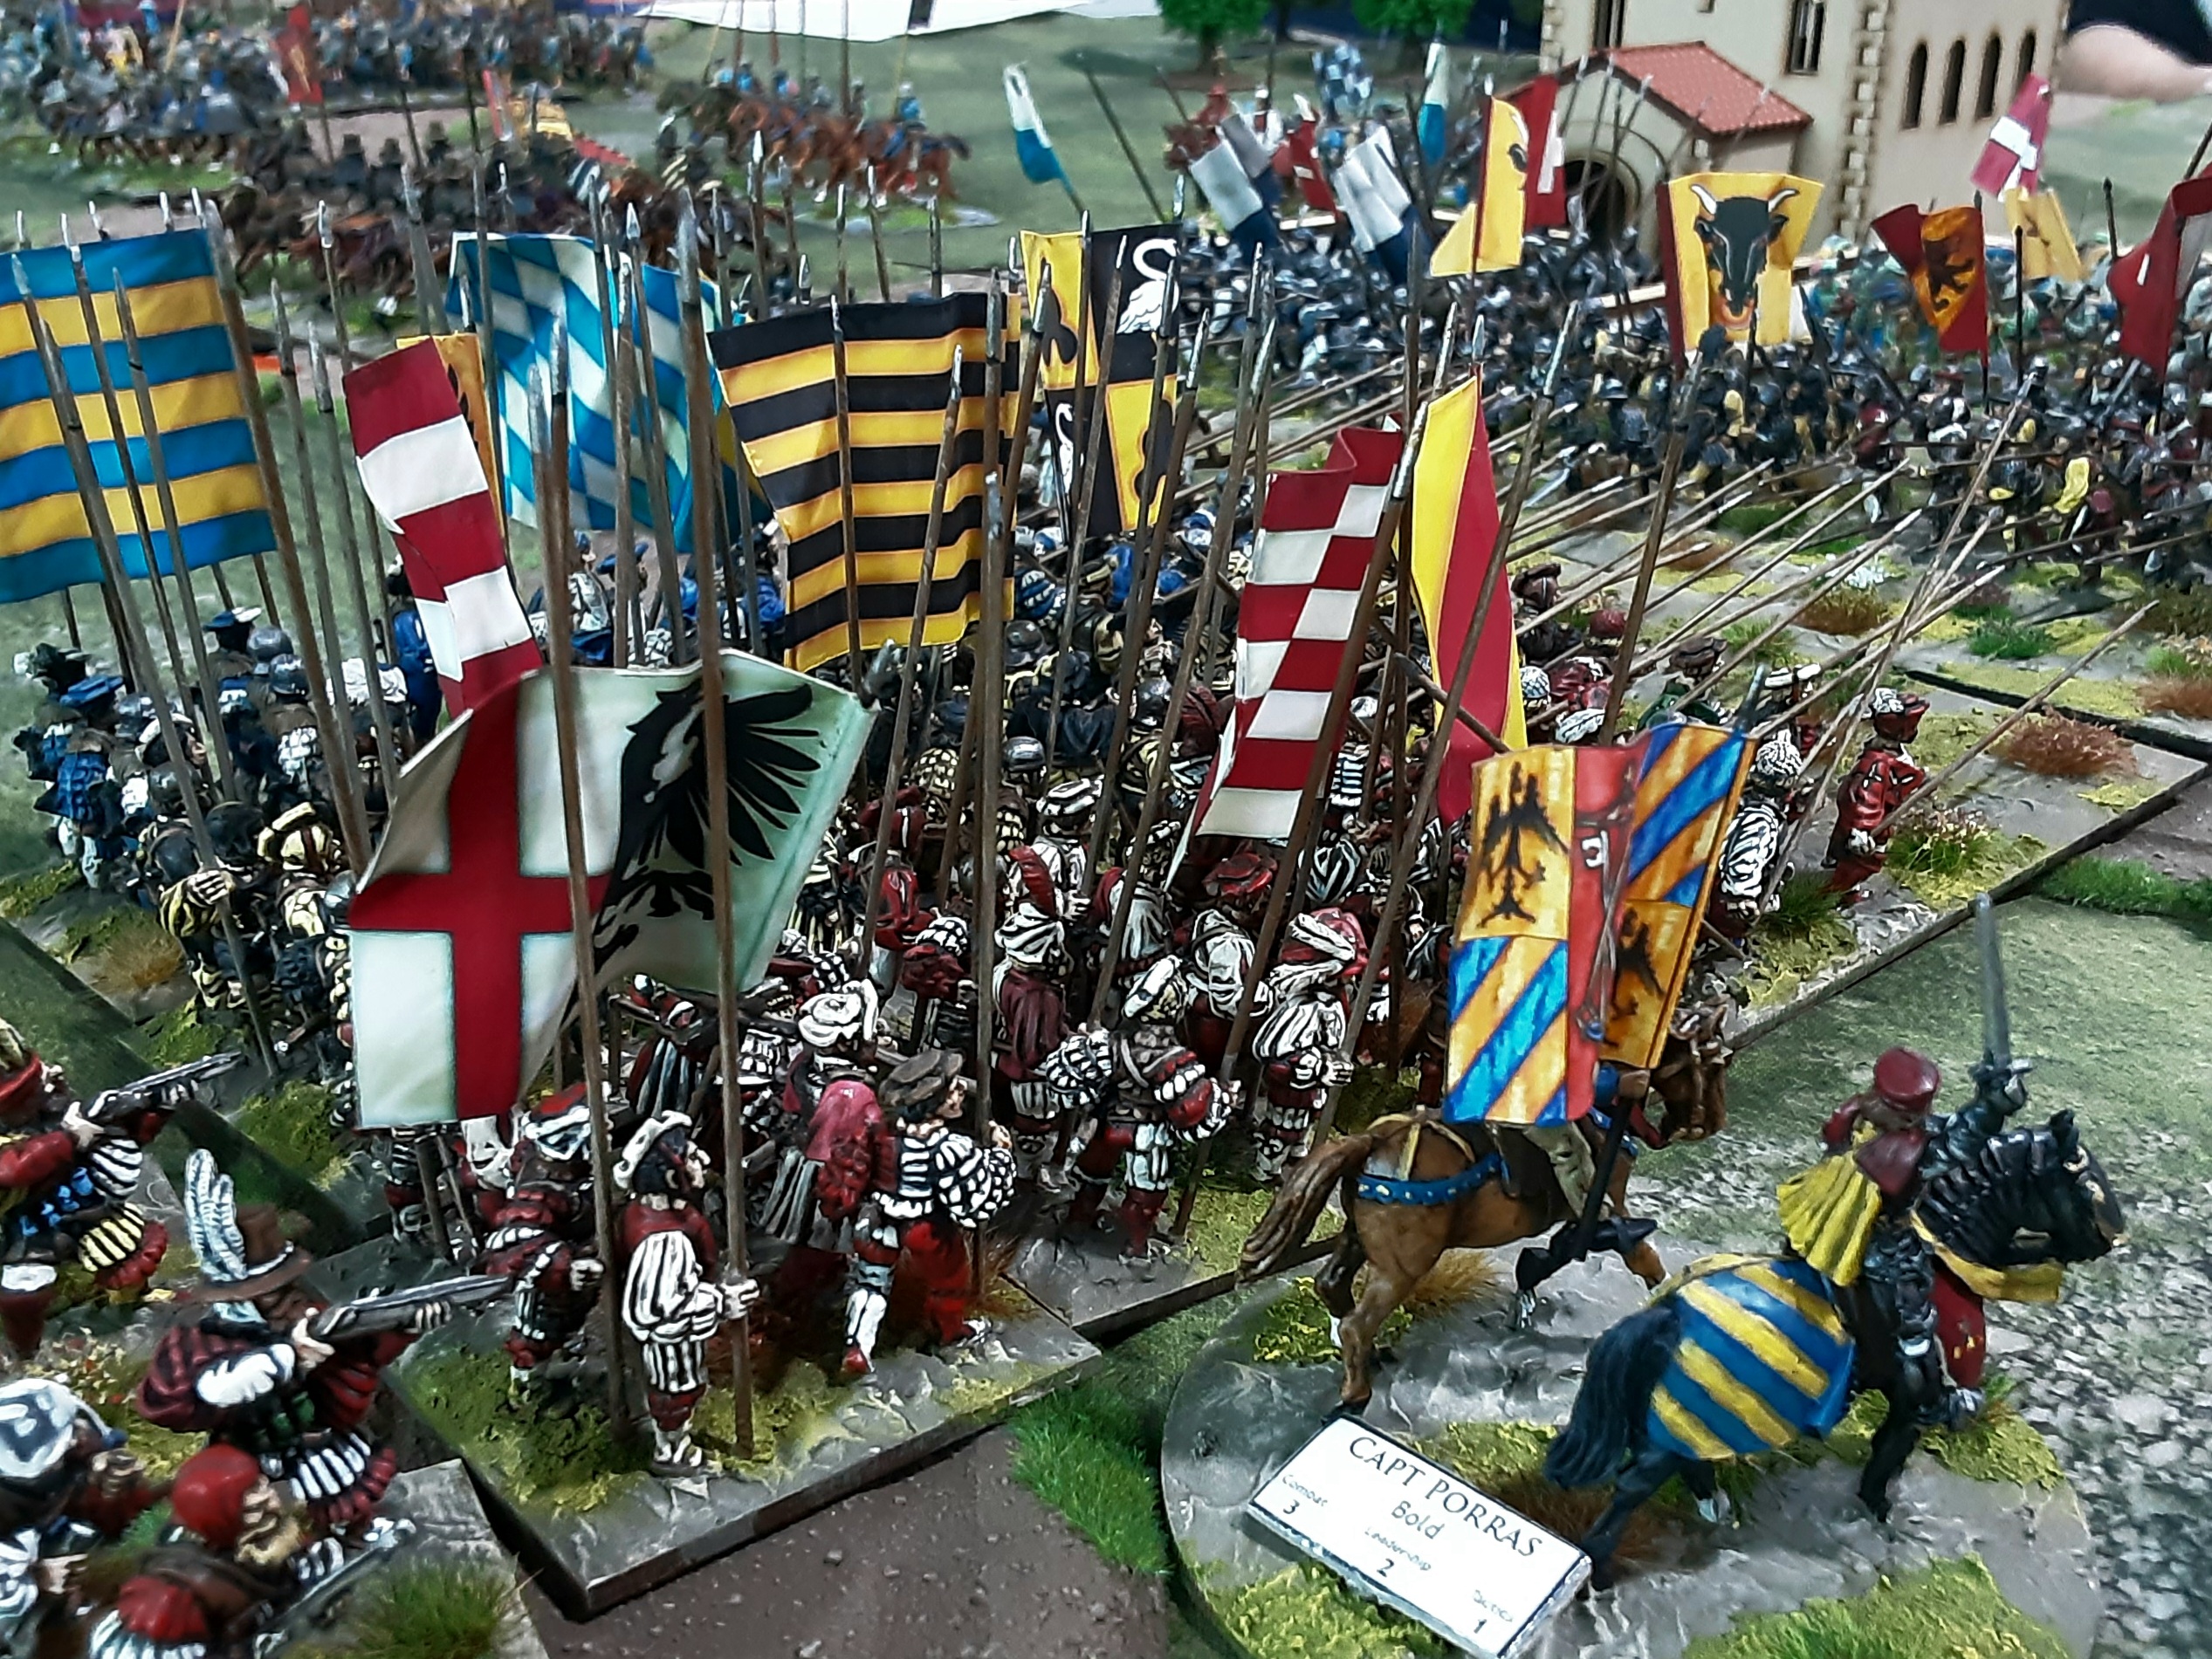
The above photo is looking along the Papal Lines, nearest the camera is Cesare and his boys, in the middle a Swiss contingent and at the far end the French.

The Papal Forces opposite Forli consisted of

Force Commander Cesare Borgia 

Infantry Commander with

2 x 48 Figure Pike Blocks each with 16 attached shot
1 x 24 Papal Foot Guard
1 x 24 Papal Sword and Shield 
3 x Heavy Guns, emplaced.
2 x 6 Mounted Arquebus 

Cavalry Commander with

3 x 6 Familia Ducal including Cesare Borgias Bodyguard
3 x 6 Condottieri 


In the Centre

Swiss Mercenary Commander

2 x 48 Swiss Pike Blocks each with 16 Shot attached
2 x 24 Swiss Polearm
1 x Medium Gun

Cavalry Commander
2 x 6 Stradiots (1 with bow, 1 with Lance)
3 x 6 French Gendarme 


French Infantry Commander on the right

3 x 48 Old Band Pike, each with 16 attached shot
2 x 24 Polearm
2 x 24 Shot
2 x Medium Guns

Cavalry Commander 

4 x 6 French Gendarme
4 x 6 Archers

659 Infantry, 114 Cavalry, 6 Guns, 797 Figures

The Sfoza Army


Inside the walls of Forli 

Forli Commander

1 x 24 Italian Spearmen 
5 x 16 Italian Shot
1 x Heavy Gun

4 x 6 Mounted Crossbow 


In the centre

Overall Sfoza Commander

German Mercenary Commander 

1 x 128 figure Pike Block with 16 attached shot
3 x 24 Independent Shot

German Cavalry Commander

4 x 6 Condottieri 
2 x 6 Stradiots (1 with bow, 1 with lance)
1 x Heavy Gun


Italian Allies Commander

Italian Infantry Commander 

2 x 48 figure Pike Blocks with 16 attached shot 
2 x 24 Independent Shot 
1 x Medium Gun 

Italian Cavalry Commander 

2 x 6 Mounted Arquebus 
2 x 6 Stradiots with bow 
6 x 6 Condottieri 
3 x 6 Italian Light Horse with lance
3 x 6 Italian Mounted Crossbow 

508 Infantry,  156 Cavalry, 3 Guns, 676 Figures


The above photo shows you the battlefield from the opposite end of the table, looking towards Forli at the end of the table on the right.

For rules we used our usual adapted Furioso. When we ran it at the show we had 3 of the 5 players who had never used ghe rules before and they were pretty much upto speed in a couple of turns.


How did we get on ?

The first thing to say is that my priority at a show is to talk to people and bring a bit of life to the game, so getting the game finished or even close to a conclusion is not always possible.

On the Papal left, Cesare Borgia did a bit of remonstrating outside Forli but never really pushed an assault at the walls which would have been interesting. Cesares Cavalry drifted towards the centre of the table towards the Condottieri attached to the German Mercenarys, this ended up in a pretty even stalemate.


The main action happened in the centre with the huge 128 figure Landsknechts block smashing into the two Swiss Blocks. Absolute carnage ensued but with the additional Polearm units the Swiss were able to flank the large Geman block and come out as winners.


The far side of the table saw the two large Cavalry forces clash, it was no surprise to see the French victorious  but the Italians were able to put on a decent fight of it and hold the French Infantry up so that they never got close to getting into action.

So with the Swiss punching through the centre it was a victory for Cesare, but the most important thing was everyone, including the new players enjoyed the game.


A Review of the Game and Scenario 

I always like to look back after a game and see what happened and how if at all it could be improved. As I said at the start of the post this was very much a rush job. The scenario was intended to be part of my Italian Wars book for Helion but since I have handed over responsibility for that book I haven't worked on it any further.

Usually I would play test a few times before releasing but as it wasn't going to be used in the book it was a great place to start and this effectively was the first play test.

On reflection I think the game was pretty well balanced, the Sforza Forces definitely didn't take advantage of their Firepower or use their light Cavalry to their best advantage however the Swiss Centre was a lot stronger than its opposition so I will be looking to bolster the German Mercenarys for the next game.


I will be taking the game (with modifications) to my local show in Pudsey. Recon will be happening at Pudeey Civic Hall on December 3rd 2022, come and say hello.

Friday, 1 October 2021

Op Compass Game 10 - Bringing Home the Pasta


It's been a while, May 2020 to be precise, since I last posted on our Op Compass Campaign, the enforced Covid break and a concentration of Italian Wars has seen a long delay between our early war desert adventures, but its time to get back to the sands of North Africa.

We use 28mm figures and a set of our own rules based very loosely on Disposable Hero's.

The history of the Campaign and additional rules specific to Scenarios can be found on the link below,

https://yarkshiregamer.blogspot.com/2018/04/opcompass-1940-resource-page.html

Historical Background 

It's the 14th December 1940 and the Italian strongpoints in Egypt have been taken and they are falling back towards Bardia. The last remnants of the Italian forces at Fort Capuzzo are heading towards the new lines and the local commander has sent out some of his armoured forces to escort the Capuzzo troops and supplies into the relative safety of his zone of control.

The British on the other hand have sent their lighter, faster Cruiser and MkVI tanks in a wide arc round the flank of the Italians in an attempt to cut the road and capture the last troops from Capuzzo before they reach safety.

Set Up and Terrain 


Our full 12 x 6 table was used and shown in the picture above, as viewed North is to the right. The retreating Italian forces from Capuzzo will be travelling towards the camera the escorting forces from Bardia away from the Camera. British forces appear to the left of the camera.

The terrain consists of a rough track which winds around an Oasis and some low hills. The whole table is scattered with light scrub which offers the lowest level of cover interspersed with small areas of rocky outcrops.

Special Rules 

Breakdown rule in play, all vehicles moving off the track roll 2d6 before moving, double 1 and the vehicle will need to roll again on the Breakdown table.

Moonlight Night - the action happens at night, it is a full moon with high winds, which is pushing patches of sparse cloud across the sky causing variation in visibility.

Standard visibility is 36 inches. Each turn roll 2d20, one plus, one minus and apply that roll to the visibility distance each turn. So a roll of + 16 and -7 will give a visibility of 45 inches that turn.


British Briefing  - You have swung round the Italian lines, you need to capture and secure the road preventing as many Italian Units from escaping Fort Capuzzo as you can.

Your forces are as follows 

Hq - 1 x A9 Cruiser Tank

A Coy 3 x A9 Cruiser Tanks

B Coy 3 x A10 Cruiser Tanks

C Coy 3 x MkVI Light Tanks 


Italian Briefing  - Your last remaining support troops are retreating back towards the new front line and Bardia. You need to hold the road open for as long as you can and get as many of the supply and rear echelon units to safety.

From Fort Capuzzo 

Hq - 1 x Staff Car with Commander and driver with 1 Truck ccontaining luxury items and 2 motorcycles 

Convoy 1 - 3 x Trucks containing Chef and his kitchen staff

Convoy 2 - 3 x Trucks containing  various items of Food and Drink

From Bardia

Hq - 1 x M11/39 Tank

A Coy - 3 x M11/39 Tanks 

B Coy - 3 x M11/39 Tanks

C Coy - 3 x M11/39 Tanks 

D Coy - 3 x Tankettes

Umpire Briefing 

The game doesn't necessarily need to be run by an Umpire as the activation deck and reinforcement rules will give all the randomness required. But this section will explain how the game should progress.

If you don't use card Activation in your games already this game uses them. Each unit above (Coy or Convoy) needs a card, in addition to that a British Reinforcement Card is required as well as an Italian Reinforcement Card. For regular players this game has no Tea Break or Event Cards.

Start the game with just three cards in the game deck, Italian HQ, Italian Reinforcement and British Reinforcement.

The Italian HQ will move on table from Fort Capuzzo on the track at the "sky" end of the table. When a Reinforcement card first comes out of the deck, that player rolls a 1d4, give a number of counters equal to the number rolled to that player.

When a player has counters in their hand, when their Reinforcement card comes out they hand in a counter, if they have no counters they randomly select a card from their available reinforcementsand add it to the game deck, re roll the d4 and the process starts again.

Italian Reinforcements will arrive at their designated entry point (see Italian Briefing). When the Italian HQ from Fort Capuzzo exits the table or is destroyed that card turns into the HQ from Bardia and a M11/39 HQ Tank arrives from Bardia.

British Reinforcements will arrive on the left of the table (as viewed in the photo) at a random location. Our table is 12 ft long so we simply roll a d12 to determine where a unit enters the table.

The game ends when the last vehicle from Fort Capuzzo exits the table at the Bardia end of the table or is destroyed.

The Convoy is merely a game timer (the players shouldn't know this). The goal of the game is to control the road whilst the Convoy is in play.


How did we get on 

The game started with the Italian HQ setting off from Fort Capuzzo (see above) and a bit of good luck saw it get 4 turns on the table before the first British forces arrived and then it was the single A9 HQ Tank which arrived at the Bardia end of the table.

The A9 set up in a Hull Down position to wait for the Convoy to arrive, when your in an A9 hiding behind a hill is a good idea !

But just as the Convoy came into sight three M11/39s turned up on the Bardia Road giving the A9 a perfect flank shot. One shot, one kill. But the Chef managed to slip off table in the excitement.

The Chef leaving the table brought on the Italian HQ Tank on the table which joined in the slug fest between the A9 and the surviving 2 M11/39s. Or at least it tried to, the tank immediately broke down with an oil leak, caught fire and had to be abandoned. Oh how we laughed !

Eventually the A9 got damaged and its 2pdr was put out of action so it had to retreat from its Hull Down location, luckily for the British their next Reinforcement had arrived the 3 A10s, which in Dec 1940, in the desert is a damn fine Tank.


All this gave me a great excuse to drive the damaged A9 down my lovely new Dry Wadi beds courtesy of The Last Valley.


The Tankettes had very wisely got out of the shooting zone very quickly and advanced to (my new Last Valley) Oasis to escort the Convoys across the Middle of the table.


The damaged A9 managed to get in the middle of the table and took out 3 trucks with its machine guns.


But the remaining M11/39s arrived on the table and despite a number of losses they managed to hold the road open and let the remaining Convoy vehicles exit the table.

And the winner is,

The British lost an A10 and had an A9 badly damaged, the MkVI tanks didn't make it on the table. The Italians lost 4 M11/39s (one to break down) and 3 Trucks. With the Italians holding the road I gave them the win and a big four points in our Campaign.

So after 10 games the score is British 20 Italians 20, only 13 more games to go !

Hopefully it won't be nearly 2 years before we do the next one.


Monday, 11 May 2020

Op Compass Game 9 - Grand Theft Auto


Before we all got locked down the crew at Yarkshire Gamer finished the ninth game in our ongoing Op Compass Campaign.

If you want more information on the previous games, special rules etc there is a resource page link below,

https://yarkshiregamer.blogspot.co.uk/2018/04/opcompass-1940-resource-page.html

The games are based on an excellent book by Robert Avery which is available from The Toofatlardies, there is a direct link to purchase the book on the Resource Page.We use 28mm figures with this scenario taking place on an 12 x 6 table using a home brew set of rules, based on Iron Ivans Disposable Hero's. However for this game I thought that the scenario was too close to the previous game so I have improvised taking a cue from the book, The Crucible of War, Wavell's Command by Barrie Pitt.


Steam rises from a broken down Rolls Royce Armoured Car
Historical Background 

It's mid December 1940 and Sgt Charles Galpin is out on patrol on the Torbruk - Bardia road making a general nuisance of himself cutting telephone wires. As the car rounded a corner it struck an exposed rock and stuttered to a halt, steam rising from the broken pipes, in a small collection of buildings by a watering hole.


Stand and Deliver
Observing an Italian Ambulance rattling down the road towards them, Galpin had a clever idea, now theft of an Medical vehicle would be frowned upon in peace time, but this my friends isn't peacetime.

The game begins as Galpin and his crew drive the Ambulance back to the stricken Armoured Car with the Italian occupants "locked" in the rear of the Ambo.


In the distance an Italian section looks on through binoculars wondering exactly what it was they just witnessed.

Set Up and Terrain 


I forgot to take a photo without figures on the table at the start so here is a shot towards the end of the game showing the terrain. You will need a single road running down the length of a 12 x 6 table, the road should wind round a couple of low hills. Looking at the picture above the British troops arrive on the road nearest the camera, the Italians at the other end.

The theft of Ambulance happens between the two small hills about 2/3rds down the table, the Italian observers are on the hill in the extreme far left.

There are no special rules in force other than those given in the briefings.

Get that tow fixed Corporal !
British Briefing 

Get that Armoured Car recovered and deal with any Italian Troops you encounter.

Italian Briefing 

The British have just nicked one of our Ambos, get the thing back and teach the cheeky gits a lesson.

Here comes the Italians
Umpire Briefing 

This game needs an umpire, certainly for the first phase, briefings for the players are deliberately vague, the scenario has a narrative start leading into a more general scrap as the game progresses.

The British player starts by attaching a tow between the ambulance and the Armoured Car whilst "persuading" the drivers to get in the rear of the vehicle. Roll 2d6 each turn needing more than 12 (in cumulative total) to get things moving. The machine gun on the Armoured Car is operational, it moves at half speed with a random plus and minus d6 modifier.

The rest of the Troop return to find out what happened to Sgt Galpin
At the same time the Italians roll 2d6 needing the same score, once they pass 12 they will run back to their vehicles and the game is afoot. The Italians have 3 Tankettes, one with a 20mm Anti Tank Rifle the other two with the standard 2 x MG layout.

When the Italian Tankettes reach the place of the initial ambush, the remaining 2 Rolls Royce Armoured Cars arrive on the road at the British entry point.

A bit of off roading
On the actual day of the incident, the Italian Driver of the Ambulance wasn't to impressed with being hijacked and this coincided with Sgt Galpin not being very good at locking the door between the front and rear of the Ambulance.

The Italian, in true Hollywood style opened the intervening door and started wrestling the British driver of his vehicle, this lasted for some minutes before Sgt Galpin regained control and fired a couple of shots into the rear of the Ambulance from his service revolver, this persuaded the former owner of the vehicle to be more accommodating.

After a bit of zig zagging, the vehicle gets back under control
To represent this when the Ambulance reaches the central village both sides roll 2d6 each time the truck moves. The highest is the winner, draws are Italian wins. If the British win, they drive as normal, 3 wins and they have subdued the Italian Driver.

If the Italians win, roll an additional d6, 1 or 2 the vehicles go straight ahead, 3 or 4 45 degrees right and move forward, 5 and 6 45 degrees left then forward. Our vehicles went off on a merry dance, narrowly missing a large rock formation (which would have been interesting) in the process.

After the Ambulance is back under control the game reverts to a more normal style meeting action.

And they are safe !
When the Rolls Royce Armoured Cars arrive, the Italians roll a d6, the result is the number of turns until they obtain reinforcements, once they arrive the British roll a d6 and that's the number of turns until they obtain reinforcements. It then alternates until all the troops arrive or a result is gained.

New troops arrive at the entry points described in a random order.

Mk VI Light Tanks 
British troops are,
1 - HQ Section of 1 x A10 Cruiser Tank
2 - 3 x Mk VI Light Tanks
3 - 3 x A9 Cruiser Tanks
4 - 3 x A13 Cruiser Tanks
5 - 1 x 25pdr Field Gun with dedicated observer in Number A.C.

More "tanks"
Italian Troops are,
1 - 3 x Tankettes (1 with 20mm Anti Tank Rifle)
2 - 3 x M11/39 Tanks
3 - 3 x M11/39 Tanks
4 - 2 x 47mm Anti Tank Guns with Truck tows
5 - 2 x 75mm Field Guns with Truck tows

Italian Troops secure the village
How did we get on 

Well the pictures to date have shown the initial stages of our game, having secured the Ambulance a group of Italian Tankettes set off in hot pursuit only to be met by the two returning Rolls Royces. Whilst they sniped at each other from a distance the Ambulance driver fought back and very nearly stuffed it into a large rock.

First the Italians got another 3 Tankettes (oh how they were happy 😂) whilst the Brits got some Mark VI Light Tanks for their first reinforcements. The Italians had some proper tanks (thats what i love about early war gaming, you get excited when a M11/39 turns up !) arrive next and rushed them forward to the village and that's where we are with the photo above. Back to our pictures to cover the rest of the game.


The British now supported by an A10 command tank took positions in the hills and a firefight started with the Italians in the village.


The Italians (partially hidden by my finger 😂) tried a flank manoeuvre to turn the Brits position on the hill.


Whilst in the village some Tankettes took advantage of what for them was hard cover.


Next arrival on table was three A9 Cruiser Tanks tipping the balance in favour of the British.


Whilst the Italians received some Anti Tank Guns who began to dig in on the hills behind the village.


It wasn't long before the Anti Tank Guns made short work of the Rolls Royce Armoured Cars who had tried to get round the flank of some Tankettes.


Things started to explode in rapid sequence now, the A10 Command Tank was taken out by a M11/39  after the two had been exchanging ineffective shots for a few turns.


The Mark VI Light Tanks decided to bug out, it was all fun and games when they were fighting Tankettes but it was getting a bit hot.


It was almost hand to hand combat with the tanks at some points.


The three M11/39s were all knocked out by the A9s, one of whom was taken out by the 20mm armed Tankette.


But the remaining Italian tanks held the village, it was a strong position the extra cover making the vehicles extremely difficult to take out.


The dug in Anti Tank Guns secured the Italian rear and flanks.


Losses on both sides were high, the British had lost an A10, an A9, a Mk VI and two Armoured Cars.


The Italians had lost 3 M11/39s in the flank attack and two Tankettes.


So we decided that it was a draw, the British had been successful in getting the damaged Armoured Car away but the Italians held a strong position in the village, losses were about even.

So for our ongoing Campaign it was 2 points a piece meaning that we stand at British 20 points, Italians 16.