Wednesday, 26 August 2015

15mm Blue Moon SYW British Cavalry - Finished Unit

6th Inniskilling Dragoons


This post further covers the figures I bought back in February, made by the American Company; Blue Moon, I wanted some 15mm British for my Minden army and ordered a couple of units of Infantry and a couple of units of cavalry. I did a full review of the figures HERE. In June I finally got round to painting up some of the infantry and did a show off post of that unit, HERE.

Before I begin though I have to doff my cap to Old Glory UK, having finished off this unit the urge to buy the rest of the stuff I wanted for the Army arrived and I placed an order for some more figures with Old Glory two days ago. As if by magic as I was typing this post (at 4pm) the postman brought my order to my front door, result. Personally I can't get used to the postie turning up that late, it were always before breakfast when I was a lad.


I use an old school method of painting horses with oil paints (which I will outline below), the time painting is very small but I leave a long time drying between stages so it can take a month to do a batch of horses, I usually try and do a load at a time maybe three times a year and then store them till I'm ready to do the full unit.


So how do I feel about these now they are painted up, I have to say impressed, they are better than the Infantry figures however most of that is down to the horses. There is a limited number of poses but they really do scrub up well, for me probably the best 15mm horse this side of AB Figures. As for the riders they do lack a bit of detail and the hands of the troopers are a touch large but that's only a small point, the faces by in large are much better defined that the infantry and are much more suited to my painting style (the exception being the mounted drummer).


I have enough horses done for another two units and one of these is already half done, with the new figs that have just arrived I have everything I need to complete my British Contingent, just need to find some decent 15mm Hanoverian Cavalry now, hint hint Blue Moon.

My horse units for SYW by in large are 12 figures and these bad boys will represent the 6th Inniskilling Dragoons.

Horse Painting

The oil method was the main way of painting horses back in the day and I think it was Peter Gilder who started the technique. I have tried with Vallejo but I just cant get horses right so I persevere with this method. I haven't done a full Box to Table post as I have some 28mm AWI British Light Dragoons on the go and will post the extended version of the horse method in that, but here are the basics.


Stage 1. The basic figure, cleaned up and primed with Halford Matt White Car Primer (for none UK residents Halfords is a car spares shop).


Stage 2, cover the horse in oil paint, the colour is up to you, but what you need to know is that this colour will end up being you're highlight. I would suggest that Burnt Sienna would be the darkest shade to use at this point. Now once you have done this you need to leave it to dry and I mean dry. If it isn't completely solid the paint will run in the next phase and you will just end up with a mess. I leave my base coat to dry for a minimum of 10 days, yes that's 10 24 hour periods. Some people will risk shorter but for me having done this method for 30 years, I leave it 10 days.


Stage 3, cover the now dry horse with a darker, shading colour which is compatible with the base colour. I would recommend adding a small amount of thinner to the oil paint for this as you need to make sure you get total coverage (this is why the base coat needs to be bone dry as the thinner will lift off even slightly damp base coat).


Stage 4, immediately after applying this coat you need to wipe it off, sounds daft I know. Its important that this is done relatively quick after the top coat is applied. I do this stage in batches of 4 horses. Make sure you use a high quality toilet roll for your wiping ! Gather the paper up so that you have a flat surface and drag it across the surface of the horse until you get the shaded effect above.

Stage 5, leave it to dry again, I leave it 10 days again but this time it will be probably dry in a couple. From there just paint the horse furniture as you normally would. I go back to acrylics for that and they will work perfectly well on dry oil paint.

I would recommend a bit of practice with the oil method if you are going to try it. You don't need to invest a massive amount to have a go, I would start with Burnt Umber and Burnt Sienna as your main two colours along with a yellow and a white to help lighten them and off you go, by mixing you can end up with a massive pallet of colours. If you like it crack on and get some different shades of browns and grey.

Hope that's been of use to some.

Friday, 21 August 2015

X Wing - The Campaign - Game 17 - Run Scientist, Run

Run Scientist, Run


This is a continuation of the X Wing Campaign, full explanation and details of Campaign rules are here.


Mission Briefing

"Gentlemen,

After your (reasonably) successful mission last time out on the planet Radix you have been retained in the area to help evacuate the scientists you helped rescue from the planets surface.

Loaded onto an unarmed freighter the scientists are going to be taken into the safety of hyper space, your job is to protect the freighter until it can wind up its jump drive and escape.

Look out for Planetary Defence fire, the battle around you is still ongoing and they will fire at anything which moves.

To your ships, May the Force be with you"

Pilot Upgrades - (from the ongoing Campaign)

Crank Case added a Barrel Roll to his action bar and traded in his old droid for a R5-K7.
Spike Sharpie spent a whole GC on a R2-D4 droid keeping back some money in case he needed to pay his insurance excess again.
Pop Cicle added another Torp slot to his A Wing filling it with some Flechette Torpedoes.
Ensign WK Jnr was in a new basic X Wing after losing his HWK last time out
Rick O'Shea levelled up to a big PS5 and traded in his Pilot ability for Playing Possum.

Set Up


Game should be played on a 5 x 3 table with the Freighter travelling along the 5ft length, entry points should be range 2 from the table edge and 1/3 and 2/3 down the length.

Rebel players set up on the top of the map within range 2 of the table edge, the Scientists set up in the centre of the table as shown.

Empire Set up with 3 ships only, a random Sqn Tie (PS1 for us), a random named Tie (Night Beast) and a Random Empire Ship with a named pilot (again random) we had Lt Lorir in his Interceptor.

Game lasts until the Rebel Scientists exit the Imperial Table edge or are killed.


Special Rules

GR75 Freighter - Do not use normal rules, ship is travelling in a straight line winding up its jump drive. It can move forward any speed each turn, Add 3 extra shield to its base fit. The ship will jump to hyperspace when it reaches the end of the table. We treated the GR75 as a mobile asteroid for collision purposes.


Jump to Hyperspace  - To leave the table you need to declare your attempt and then try and gain 2 critical hits, hits from previous rolls carry forward. You cannot attempt to jump until after turn 4.

Turn 1. Roll 3 attack die
Turn 2. Roll 3 attack die + Pilot Skill / 2 (round up)
Turn 3. Automatically jump

Jump Points - Points A,B,C,D act as entry points for Imperial Re-enforcements.

Imperial Ships - On turns 3,5,7 and 9 3 Imperial Ships will arrive on the table, randomly at one of the 4 entry points, they enter after movement dials have been set but before movement takes place. They can set up within Range 1 of the entry point facing in any direction, they can perform an action for that turn but will not move on their first turn on the table. After their entry turn they will revert to normal movement.

Select one Sqn Tie, one named Tie and one Random Ship with a named pilot (see rules link at the start of the post if you are not familiar with how we choose these).

Planetary Defence Fire - Each even numbered turn pick at random one of the entry points, this will be the focus for the PDF, any ship within range 2 of the point will be subject to 3 attack die. PDF is performed after all firing has taken place.


Victory Conditions

Rebel Victory -  Get the scientists to safety.
Imperial Victory - Destroy the GR75.
Draw - Any other result.

How did we get on

Five rebel scum this evening, in what was always going to be a tough campaign game, the Rebels need a bit of luck to get this one done, they didn't have any.

It all started going wrong very early on, after the initial skirmish with the outnumbered Empire ships the first group of Empire re-enforcements turned up on entry point A (we had a PS4 Tie, Dark Curse and Mareek Steele in his Tie Adv) just on the flank of the Rebels and the GR75.

It was all over on Turn 5 when the second group of Imperial ships entered on the same point (PS4 Tie, Howlrunner and Darth Vader in his Tie Adv !) directly behind the rebels and they easily finished off the Freighter.

There was a bit of a kill fest for the Rebel pilots though as they were fighting the Imperials in dribs and drabs, 5 Imperial ships were lost in the game quite a tally and two of them went to PS1 Ensign WK Jnr, clearly out to avenge the death of his father.

The planetary defence didn't hit anyone, this is a nice random scenario which could change very quickly, a planetary burst taking out a couple of Empire ships would change the balance as would a re enforcement turning up at the other end of the table. In our game they didn't and the Rebels lost, all pilots did however jump to safety.

Game of Chicken
Rebel Pilot results below,

Pilot Rick O'Shea (5) - B Wing, survived, 3 kills, 9GC - Totals, Missions 17, 9 GC, 21 kills
Pilot Spike Sharpie - E Wing (4), survived, 0 kills, 1 GC - Totals, Missions 17, 6 GC, 13 kills
Pilot Crank Case - Y Wing (3) survived, 0 kills, 4GC - Totals, Missions 12, 8 GC 9 kills
Pilot Pop Cicle - A Wing (3) survived, 0 kills, 1 GC - Totals, Missions 10, 3 GC, 2 kills
Pilot Ensign WK Jnr (1) - X Wing, survived, 2 kills, 10 GC - Totals Missions 3, 11 GC, 3 kills

Not Present
Pilot Captain Tangent - A Wing (3), not present, 2GC  - Totals, Missions 8, 3 GC, 0 kills
Pilot Baby Brian - A Wing (1) not present - Totals Missions 1, 0 GC, 0 kills
Pilot Oi M'Groin - Y Wing (2) not present - Totals, Missions 4, 3 GC 0 kills
Pilot Sir Jeremy Dodger - X Wing (2), Not Present - Totals Missions 3, 7 GC, 2 kills
Pilot Twiki Bond - A Wing (1), Not Present - Totals Missions 1, 6 GC, 0 kills

Roll of Honour
Pilot Brian RIP
Pilot Commander Wayne Kerr veteran of 7 Missions, RIP


Jim head mechanic in the Rebel Garage was still asleep

Result (2 pts for a win, 1 for a draw)

Empire Win

Campaign overall score is, Empire 14 pts, Rebels 20 pts

X Wing madness will return with game 18 on the 2nd September. A battle to save another Rebel Squadron stranded in Empire Space with no power.

Wednesday, 19 August 2015

Panzers In Normandy : Then and Now : and Now

And Major and Mrs Holts Normandy Guide

Two books maketh a holiday
Two weeks off the blog and the books above are responsible, that and the 14th Century WiFi in the cottage I was in on my holidays in, you guessed it, Normandy.

Now I have to say that I am quite lucky in that Mrs Yarkshire and Baby Yarkshire both don't mind a bit of history and Baby Y (aged 15) likes anything involving either Tanks or Bunkers so a good time was had by all.

Both books should be quite well known in the circles who read this blog and both now quite old. The Panzers in Normandy book was something I longed for as a teenager in the mid 1980s and I remember saving up especially to buy it for the then massive sum of £20. It was a originally written in 1979 but the After the Battle Magazine added some photos in 1983. It gives a good history of the vehicles and units that operated in Normandy but its USP was its use of modern (1979) photographs taken at the same locations as ones taken in WW2, for some reason I found that fascinating and using the book and finding some of the locations in 2015 was very satisfying.

The Danish D Day memorial
The Holts have produced a series of Battlefield Guides over the years and I have used them for the WW1 battlefields and found them excellent. I have had the Normandy book for 15 years or so, written in 1999 it has dated quite well. For those unfamiliar with the Holts work; they split the battlefields into a number of tours and give you driving directions to various locations. Added to that are various individual accounts from the action at that location which really bring things to life. You get all the normal touristy stuff but you also get some out of the way memorials, like the Danish one above, sites which without the books probably wouldn't get a visit. So here some boring holiday pics wrapped up in a book review for some books which are between 25 and 35 years old, topical !

Utah Beach and the US Para Drops


The day starts in St Mere Eglise, lots to see and the US Airborne Museum opposite the church is well worth a visit.


The "Iron Mike" statue at La Fiere, the Holts book has some great stories at this location which really brings the scene to life.


We spent two days to cover the first tour, taking things easy, Utah Beach being away from the other 4 beaches was less of a tourist trap and was the only beach we spent any time at, the museum at the beach is worth a visit even with the M4E8 outside.


Further down the beach near the French memorial is a group of bunkers (cue Baby YG smile) free to access and roam, found thanks to the Holts.


Last stop for us on the day was the Battery at Azeville an interesting tour leading you underground through the tunnels to the various bunkers (Baby YG heaven). The Battery entered a gunnery duel with USS Nevada and her 14" guns, the aftermath of which is shown above.

Omaha


The day started really well with a visit to a tiny church in a village called Brevands, there is a D Day stained glass here but the moving thing for me was the grave of a RAF Spitfire pilot who was killed over the area in 1941, it was really well maintained and contained detailed accounts of the young mans final action.


The famous Pointe du Hoc site is well maintained by the US Government and was very busy but informative and well worth a visit as is the main American Cemetery.


Is this the scariest manikin in the world.
One of the highlights though is the visit to the Overlord Museum which is opposite the Cemetery, only recently opened there are some great exhibits here. I have seen some complaints about entry cost 7.5 euros which is 2.5 euros more than most other museums but I don't think its overpriced. This is the only place in Normandy you will see a Panther Tank and they have an unsurpassed (for the area) collection of German equipment. All the exhibits are set out as dioramas and well presented, lighting is subdued but I would suggest this is to protect the exhibits.

I gave up with Omaha Beach itself, it was absolutely packed with holiday makers on the beach, probably just me but I wouldn't want out of respect to swim there. We drove along the beach and back out. One day I will go back out of season.

Michael Wittmann

Anyone with an interest in WW2 and its battles will know of "The Black Baron" I recall reading the section in the Panzers in Normandy (PIN) book and our day out on the Tiger trail for me was the highlight of the holiday.


My view from the commanders seat.
First up was a long drive to Vimoutiers a small town to the east of Falaise where a lot of German armour was abandoned in the final days of the Normandy Campaign. In a lay by out side the town is a Tiger Tank ! This to me is amazing there are only 6 of these left in the world and here is one I can climb on, left at the side of the road. The PIN book gives a full account of the Tank and its recovery with some great contemporary photos.

2015 view of the photo on page 171 of PIN
Roadside memorial to the losses of 7th Armoured on the day.
A cross country drive brought us to Villers Bocage the scene of Wittmanns most famous action, much changed from 1944 we still managed to follow the action through the streets and using the photos in the PIN book located many of the locations.


A short drive then to Gaumesnil the scene of The Black Barons final action, again described in detail in PIN, we were able to locate the location of his tank and the action that day. There are no markers or monuments. A note if you do visit the area Gaumesnil village is now cut in half by the N158 which is a dual carriageway and not crossable by foot and I wouldn't recommend parking on it either.

If you travel into the village from the south (it is a tiny place) turn right in what looks like a farm yard down a dead end track which will bring you to the now closed junction with the N158, on your left is the location of a now destroyed chateau which was destroyed in a fire caused by drunken British soldiers (no change there then !) the wall to your front right bordering the road (behind the post war house) was there on the day and was used by the British tanks which are likely to have killed Wittmann as cover, look closely you might see some repaired Sherman sized holes.

You will then need to cross the N158 and join the minor road which runs along the eastern side of the main road. Witmanns tank 007 was destroyed in the field to the north of the Farm Machinery Garage as shown above


Final visit of the day was to La Cambe the German War Cemetery and Witmanns final resting place, he was buried with his crew at the side of the road next to his tank for many years until his remains were located in 1983 and moved with his crew to La Cambe.

Unbelievably someone had stolen Wittmans headstone, there are some sick people in this world. The cemetery is well worth a visit very respectful.

The British and Canadian Beaches

Churchill Tank at Bayeux
Hetzer same location
 We spent two days following the tours of Gold, Juno and Sword beaches, the Museum at Bayeux covers the Campaign following the landings as is another worthy of a visit. From there you can leave your car and walk to the British and Commonwealth Cemetery just over the road.

128mm barrel at Bayeux

Port En Bessin
Longues Battery

Arromanche was packed as well on the day we visited, with a live band playing rock music in the harbour and a fairground it was hard to picture the action on the 6th June 1944. The 360 Cinema is worth a visit only 20 minutes long but very well done. The main focus of the Canadian beach is at Courseulles sur Mer with an excellent museum (I forgot my camera that day !). I had visited all the British Airborne sites a few years ago and these are covered by the Holts in great detail.

So a great holiday guided by two great books, if you are interested in WW2 Normandy is a must once in a lifetime. The Holts Arnhem Guide is on the way from Amazon, anyone know any good holiday cottages in Holland ?

Monday, 10 August 2015

Libya or Bust - WW2 Naval Campaign - Part 4

The End of the Line for the Great Tripoli Dash

The British Battle line under fire

Welcome back Naval Gamers to the fourth and final part of our journey, if you are new to this set of linked scenarios then you can catch up with the first post HERE. 

The second game write up is HERE and the third game is HERE

Once again I have repeated some of the information below from previous posts to help any newcomers to the games.

We are following the adventures of an Italian Convoy en route from Naples to re supply the Italian and German Armies prior to a major assault on Torbruk. Our first encounter saw the Royal Navy scamper away with a self inflicted bloody nose, the second was slightly more even,whilst the third saw the stakes increased with the arrival of the first Capital Ships, now our final action brings together the opposing fleets in a battle of the big guns.

Umpire Notes

This is a linked scenario from the previous games so if you are following this the damage / lost ships maybe different so the following is only general guidance. Any sunk ship is lost. Any ship with damage I will remove half the recorded damage from the previous game so that it will start the next scenario with a reduced damage value, I do the same with lost speed. Any knocked out features like turrets / torpedoes etc I roll a d6 with a 50:50 chance that the feature was not as badly damaged as first thought and is available for this game. Once this is done you need to make a common sense decision on whether or not a ship would stay at sea, in our first game the Italian destroyer Libbecco had suffered a Fuel Fire and a Rudder hit at the end of the game and was below half damage points, its obvious that she would have sailed for the nearest friendly port.


Golf tees for splash markers.

British Briefing morning 10th Nov 1941

The actions over recent hours have led us to this moment, the planning from the Admiralty has brought together the biggest guns in the Med under your command, use them well. Your mission remains, stop the Italian Convoy from reaching the Libyan coast and Rommel. This will be your last opportunity to prevent these supplies reaching the DAK so make it count. Intel reports suggest a large Italian escort on this final leg of the journey, a force containing a number of Battleships, it may not be easy but England Expects.


Italians under fire

Italian Briefing evening 9th Nov 1941

We are nearly there, the coast of Libya and the Port of Tripoli are close and this is the final leg of the journey, the Head of the Italian Navy has sent you the most powerful force the nation can muster to force the convoy home. Recon aircraft have spotted the smoke of the main Royal Naval Battle Fleet steaming to intercept you from Alexandria, an epic battle awaits.


Set Up (This includes our losses from Game 1,2 and 3 if following along use your losses)

British

Force K - HMS Lookout (DD) (The only British ship left from Game 1)
Force B - HMS Ajax (LC), HMS Kingston (DD), HMS Kimberley (DD), HMS Janus (DD), HMS Jervis (DD)

Force K and Force B deployed as a single screening force.

Force A1, HMS Renown(BC), HMS Norfolk (CA), HMS Sheffield (CA), HMS Greyhound (DD), HMS Glowworm (DD), HMS Nubian (DD), HMS Ashanti (DD).

Force A, HMS Queen Elizabeth (BB), HMS Warspite (BB), HMS Barham (BB) HMS Valiant (BB), HMS Gloucester (CA), HMS Phoebe (CL), HMS Coventry (CL), HMS Vixen (DD), HMS Voyager (DD), HMS Vanity (DD), HMS Venus (DD) HMS Valentine (DD) and HMS Vendetta (DD)

Italian

Convoy Acca - Maestrale (DD), Grecale (DD), Turbine (DD) and 6 merchant ships

Lt Cruiser Division - Bande Nere (LC), Montecuccoli (CL), Attendo (CL)

Heavy Cruiser Division - Trento (CA), Trieste (CA), Alpino (DD), Carabinere (DD)

Heavy Division Duilio - Caio Duilio (BB), Garibaldi (LC), Fuciliere (DD), Vivaldi (DD), Aviere (DD), Geniere (DD), Granatiere (DD)

Italian Battle Line - Littorio (BB), Conte di Cavour (BB), Giulio Cesare (BB), Fiume (CA), Bolzano (CA), Folgore (DD), Lampo (DD), Baleno (DD), Borea (DD), Zeffiro (DD), Nembo (DD)


SET UP

We fought the battle on our regular 12 ft by 6ft table, RN screening force and Convoy Acca both sailing in the same direction (along the 12ft length) just out of range of each other. 1ft in from the short table edge.

Force A1 and Heavy Division Duilio set up 3d6 inches in front of the above sailing in the same direction 6" in from the table edge.

Randomly set up the remaining ships by Division, divide the long table edge into 20 sections and roll 1 d20 to determine location for the lead ship of that group. 1d12 for direction of the lead ship, set up the remainder in line behind (with ships off table moving on behind).

We ended up with the two main forces heading towards the ships from the previous games broadside on to each other.


Umpire Notes

This is the last game of the series and we allocated a full days gaming to it.


Air Power should be allocated at random, we have a separate air phase in our game turn and during that part of the turn each side rolls a d20 with the following results. Each flight is 6 planes.

15 - 1 flight of Fighters (VF), 16 - 2 x VF, 17 - 2 x Torpedo Planes (VT) or Dive Bombers (VB), 18 - 2VF, 2VT and 2VB, 19 - 3VT or 3VB, 20 - 3VF, 3VT, 3VB.


Good Italian Air Power

How did we get on

The big finale didn't disappoint, there were a lot of factors coming together in the final game and with 60 ships on the table there was a lot to be going at. Luckily most of us have a grasp of the rules so with everyone able to work out their own gunnery etc we could keep things moving at a relatively quick speed.

The game started badly for HMS Coventry who lost a turret on the first turn but even worse for Fiume who was unlucky with the set up, at that location the British had a spare Battleship and rather than doubling up Warspite decided to pick on Fiume. Cruisers and 15" shells don't mix even when the Cruiser is a heavy one.

All over the table the dice gods were laughing as player after player failed to convert half hits into damage whilst over the table the British Fighters were gaining air superiority over their less able Italian counterparts.
Not sure, did I hit anything !
The first serious damage however was to Renown, continuing her long range duel with Caio Dulio from the previous game, the Italian ship managed a hit, at long range Renowns armour would protect her in most areas however luck or fine shooting put an Italian shell into the Battlecruisers funnel a random roll meant she lost 10 knots of speed. Moving quickly was no longer going to be extra armour for her and Renown was to keep her distance for the rest of the game.

In the same turn the Italians lost the destroyer Nembo who withdrew after a bridge hit but it was the Italians who had the edge.

Comedy driving from the Italians as Littorio narrowly misses a destroyer
The previous turn however seemed to activate a table wide funnel magnet and the British Battleships managed to hit the funnel on both the older Italian Battleships slowing them down to 20 knots and 18 knots, Renown had the luxury of turning away but the Italian ships needed to stay in line to keep the pressure on the British.

Fiume on the other hand never had a chance and relentless hits from Warspite sent her to the bottom of the sea, a hit on her rear turret led to a chain of explosions putting all her turrets out of action, she turned away with less than 5% of her damage points left and fell apart on the open sea.

The next turn saw a major Italian Air attack, 2 flights of Bombers and 2 of Torpedo Bombers, escorted by 2 flights of fighters. But readers of the series will know, Italian air support is not always a blessing.

Bad Pilot, Naughty Pilot !
With a 30% chance of attacking their own ships the Italians excelled with their die rolls and only two flights attacked British ships, against the odds and frustrating for the Italians, hilarious for the British. Even more fun were the attacks, the one the Italians wanted to work, on the already damaged HMS Renown managed to get through the heavy AA fire and launch torpedoes, a slim chance but its a HIT !, roll for damage, .................. its a DUD, again. Cue Italian heads hitting tables.

Clearly unhappy with the Italians the dice gods had not finished, there was still the Italian attack on there own ships to work out, the Light Cruiser Garibaldi was the target. The Italians roll the dice, its their planes attacking their ships. 500lb bomb straight through the roof of B turret, no dud this time !
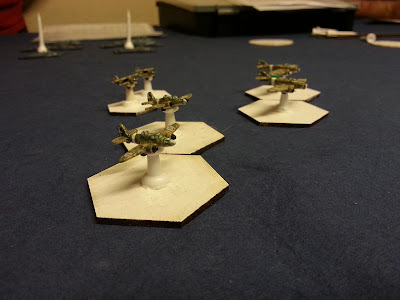
The Italian Air Attack (before it split up and attacked its own ships)

The Battleship fight was well underway at this point and the Italians had the upper hand, HMS Valiant lost her B Turret to Littorio, the modern Italian ship, the best on the table was showing her class. Cavour on the other hand managed to hit Barham 5 times in one round but only got one; relatively ineffective; penetrating hit.

But the next turn the advantage swung back to the British with a turn we dubbed "The Death Ride of the Italian Destroyers". Both sides simultaneously swung their destroyer escorts out towards the opposing battle lines in an attempt to get into a position to make a torpedo attack, squared off against each other at short range it was always going to be bloody.

It was, Borea and Zeffiro sank quickly from accumulated damage points whilst Baleno blew up following a turret hit, the explosion from that ship set fire to Folgore and Lampo the two remaining Italian Destroyers in that squadron, to make things worse the debris from Baleno took out Lampos bridge and in one turn 5 destroyers were gone or as good as gone.


The game changer happened in the next turn, Littorio was still the best ship on the table and able on her own to cause havoc but she was hit again and this time the British shells took out her Fire Control Systems, its a rare hit but a serious one. All further hits made by her would be halved; the Italians were in trouble.

With their best ship no longer a threat and two of the remaining Battleships below 20 knots the Italians decided to withdraw and abandon the convoy, slipping away whilst the British converged on the convoy the Italian Fleet lived to fight another day. The convoy ships were scuttled and Rommel would have to wait for his vital supplies.

So in the end a British Victory. In our final game the British lost only 2 destroyers (Vixen and Vendetta) sunk however Renown was down to 20kts and the Cruisers Norfolk, Ajax and Coventry had all lost turrets. The Battleships hadn't come out of the action unscathed either, all had some form of damage. Warspite had only been hit once but had lost two turrets, whilst Valiant had lost a turret and half her damage points.

The Italians lost 5 destroyers and a heavy cruiser sunk with a further destroyer withdrawn. Its battle line was similarly damaged. Littorio had suffered as described above whilst the Cesare and Cavour had both lost close to half their damage points. Added to that the Cruisers Garibaldi and Trieste were badly damaged.


Thoughts on the Campaign

Firstly as mentioned in previous posts thanks for all the interest in the Campaign, previously hits on my Naval pages have been quite low compared with other topics on the blog, this set of posts have turned that around with all three posts being in the top 10 of all time reads, so thank you.

This is the second of these linked scenario campaigns I have done and I have to say for me its the way forward. I have tried the all encompassing campaign, plotting individual search patterns etc and they are hard to run and even harder to keep people interested in.

There were moments in the games where the course of the campaign could have swung either way and I would be interested to see how other people got on if they tried the games with their rules. If the Italians had armed their torpedoes and attacked the right ships how different it could have been.

That will be it for a while for WW2 Naval, time to get back on the land for a while. I would think that most of my Naval gaming for the rest of the year will be in the development of the WW1 rules which will be on the blog one day.

I will no doubt do another Campaign next Easter, I haven't thought of an idea yet so any suggestions from the readers of Yarkshire Gamer ?. Let me know what you would like and I will write the scenarios for you, cant say fairer than that.