Sunday 21 December 2014

AWI - Battle of Guilford Courthouse 1781 - Battle Report / AAR

A British Grenadier presentation. 

Welcome back everyone, to the AAR of Guilford Courthouse,  following on from the success of the scenario post we bring you the action.

WARNING : This post will contain pictures of Highlanders in kilts ! Guards in bearskins, no Cavalry and a picture of a British unit retreating.

The first shots.
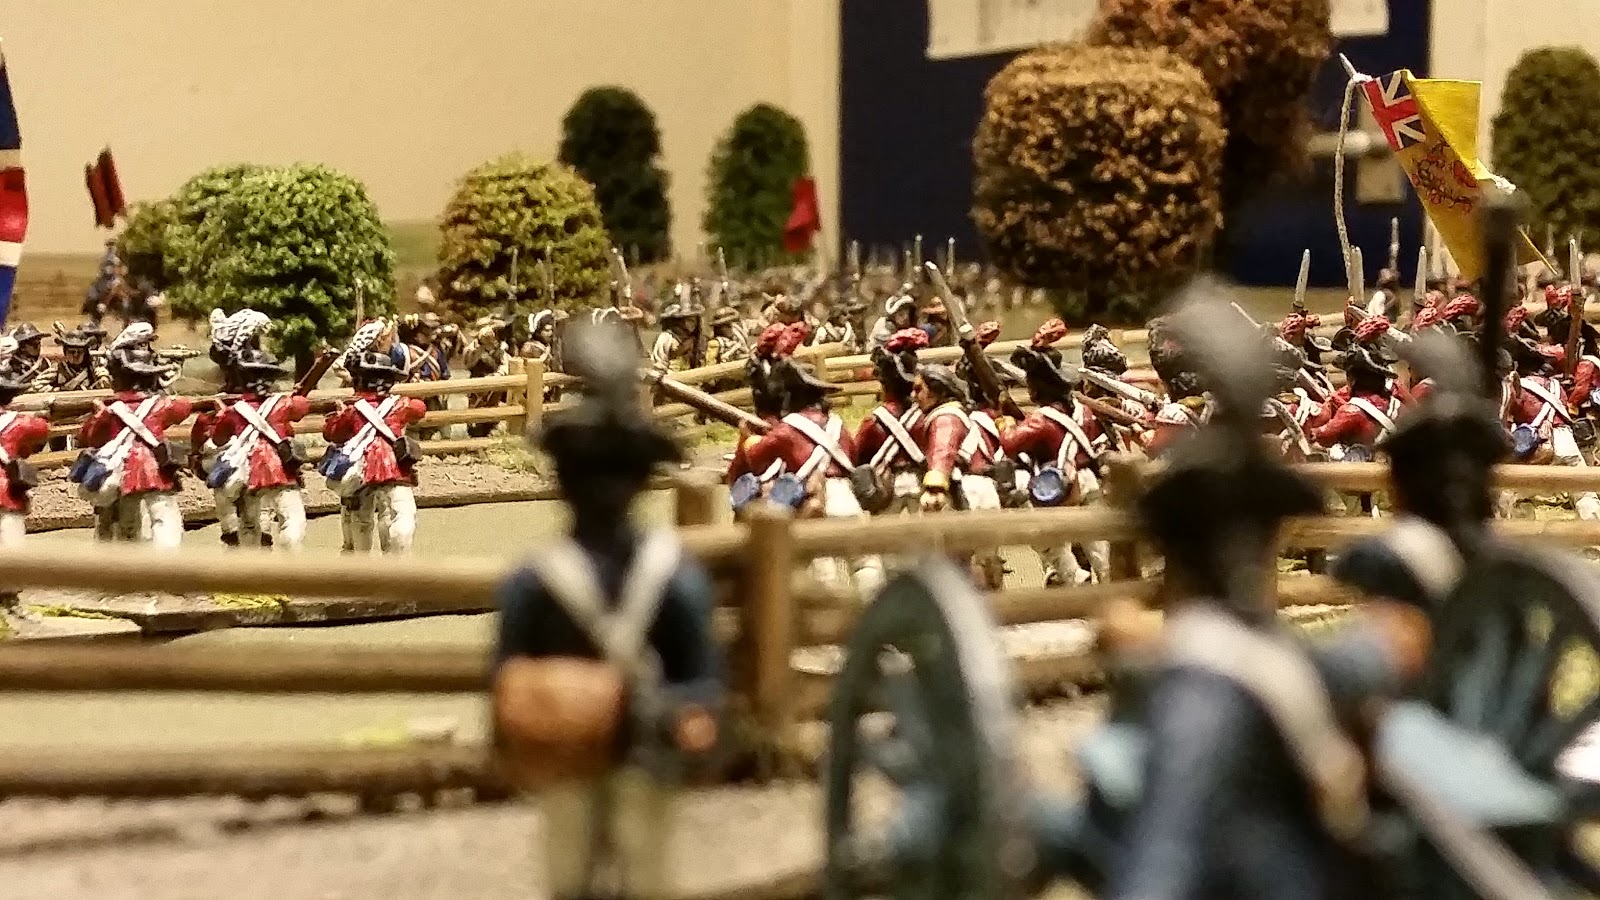
The Brits began as expected, the Highlanders and Hessians advancing on the right, the 33rd and 23rd on the left with OHara bringing up the rear, onwards towards 2 brigades of American Militia, there could be only one result surely.

The 42nd who had kilts masquerading as the 71st who didn't
Early in the game I (playing the Americans) had one of those turns when you wish the luck you just had on the wargames table was actually in a casino. All along the front I rolled nothing less than an 8 on 2d6 and rolled back to back double 6 against the Highlanders with a battalion and a 6pdr loaded with grape. For those not familiar with the British Grenadier rules a double 6 gives you 2 extra casualties and a risk to nearby officers, the officer escaped unharmed, the battalion did not.

 Yellow counters are DPs, black for casualties, small for 1, large for 5, that's 13 loses
The Hessians weren't too happy either but soon recovered
The attack on the right faltered under the heavy fire and the Highlanders already with 50 percent casualties weren't going to take an active part for the rest of the game. The attack on the left was much more successful, not facing any artillery and supported by a 6 pdr the British steadily whittled away the Americans with sustained accurate musketry. Being Militia they could only rally dps whilst stationary with a general attached, so once the units had 3 dps the casualties mounted up, until the inevitable happened and the line broke.

The first line of defence breaks.
On the right the Guards had pushed forward to take the place of the Highlanders and the pressure from them and the risk of being flanked broke that side two, the 6pdr gun which had fired the first shot of the day and decimated the 71st Managed to escape and redeploy within the second line.


A pause in the action as the British reform and rally off dps prior to attacking the second line.


There was a definite lack of subtlety with the attack on the second line, a quick soften up with the artillery, a volley and a bayonet charge and the job was done.

As Monty Python said to the rabbit, Run Away !
British piquets present the American General Butler to Cornwallis after Butlers horse bolted into the British lines whilst under fire.

Not much different on the right, charging Guards Battalions sweep all before them, finally silencing the 6pdr gun which had devestated the Highlanders.


The Courthouse comes into view as the Americans shorten their lines for a final stand.

The British advance on the left towards the third line, it wouldn't be a Yarkshire Gamer AWI report without a shot of some bewildered live stock in the middle of a firefight.

As the final attack begins another American General, this time Eaton, who had survived the first two attacks is captured.


An overview of the end game, the last hurrah of the Americans begins as two Maryland units advance off the hill under direct orders from Greene to charge the 33rd who had become isolated on the British left, in the background you can see the hordes massing for a final attack on that side. The Americans had fortified the Courthouse and were waiting.

Charge !!!


Yes that is a British Elite unit running away, the 33rd, Yarkshire men too, so embarrassing, even when I'm playing American.


The Guards units run out of steam, Elite units are so hard to stop in British Grenadier but these boys had come a long way and only started 16 strong, withering fire from the hill and sniping on the flank from the courthouse were starting to cause casualties. I have used my combined Grenadier units for the Guards, I was tempted to call them Grenadier Guards and sit back and watch the carnage on TMP, but didn't have the heart. Must get more figures and cavalry and Highlanders in trews.


My favourite photo of the day, the end of the game and the Americans hold on to the final hill, the American commander saluting the foe.

We decided on the night on a draw but looking at the scenario is was closer to an American victory, the decisive move being the American charge on the British left.

Win, Lose or Draw we all really enjoyed this game and that's what its all about, what gamer doesn't want to play games like this with good mates and nice figures. I can certainly see us doing this again when I've got some cavalry. Its a close run thing for both sides and a game both can win.

Next up on the table we will be our traditional Christmas game, off to the Middle East for a spot of WW1, gunboats and camels ahead.

Saturday 20 December 2014

X Wing - The Campaign - Game 8 - Pirates

Game 8 - Pirates

This is a continuation of the X Wing Campaign, full explanation and details of Campaign rules are here , details of Empire force builds are now up on that post as well.

Rather than the usual 2 scenario write up there is just one this week, with the festive hols there is a big break from the club for a few weeks so the next X Wing game will be early January 2015.

Please note that this scenario was written before the release of the scum and villainy faction.

New Campaign Rules

1) Unless otherwise stated in the scenario hyper drives will not function until turn 4 of the scenario.
2) After game 8 upgrades will be limited to a maximum of 2 per player per game. 


Pilot Upgrades -

Rick O'Shea nearly exploded my brain with a load of changes the details of which I cant find at the mo.
Spike Sharpie paid back the money he owed the bank and saved his kneecaps.
Crank Case spent 8GC on Fire Control, a Autoturret and increasing his Pilot Skill to 2
Oi M'Groin spent his 2GC on an Autoturret
Brian spent 11 GC on increasing to PS 2 and buying an R7A Astromech and Proton Torps
Pop Cicle spent 8 GC on increasing PS to 2 and adding a shield upgrade
Commander Wayne Kerr spent his 4 GCs going to PS Level 2
Captain Tangent was back in a new A Wing.

Mission Briefing

"A group of Pirates have hi jacked an Imperial Convoy containing plans and parts for the new updated Tie Droid MKII, however a systems malfunction has ejected the containers holding the information into deep space"

"The Pirates have realised their error and are racing to the location to retrieve the valuable data. We must get there before them, expect heavy resistance, get the info and get out of there !"

Set Up


Pirate ships should be 1 Slave 1, 1 Y Wing and 1 Z95 per three rebel players. As there were 8 rebels I removed a Y Wing to even it up (a bit).

Upgrades are, Slave 1s have Heavy Assault Cannons, the Y Wings an Ion Cannon in a turret.

Pirate Y Wings have a Pilot Skill of 2, the Z95s PS1, the Slave 1s should have their pilots drawn at random from those available. I always make the Rebel pilots choose the named Empire pilots blind from a deck of avaliable cards, so its their fault when they pull Boba Fett out of the deck first card. We also had a PS3 and a PS5 Slave.

Both sides start range 1 from their respective table edge, three containers are spread randomly across the middle of the table (standard 3 x 3).

Special Rules

Containers - Move randomly as asteroids every 3 turns. When a rebel ship is within range 1 of a container they may declare a SCAN action (and therefore not perform any more actions that turn) roll 1 red die and any hit scans the container. All three containers must be scanned to complete the mission.

Jump to Hyperspace  - To leave the table you need to declare your attempt and then try and gain 2 critical hits, hits from previous rolls carry forward.
Turn 1. Roll 3 attack die
Turn 2. Roll 3 attack die + Pilot Skill / 2 (round up)
Turn 3. Automatically jump


Victory Conditions

Rebel Victory - Scan all three containers and exit at least one ship with the results.
Imperial Victory, The Pirates prevent the above.

How did we get on

Just the 10 players this week, myself and Steve the stalwart Empire players reet enjoyed having some decent ships for once.

8 Rebel pilots took on the might of the Empire in a game which saw the first death of a Rebel Pilot.

Pilot Rick O'Shea (3) - B Wing, shot down survived, 1 kills - Totals, Missions 8, 1 GC, 7 kills
Pilot Spike Sharpie - X Wing (3), survived, 3 kills - Totals, Missions 8, 10 GC, 8 kills
Pilot Oi M'Groin - Y Wing (2) survived - Totals, Missions 3, 0 GC 0 kills
Pilot Crank Case - Y Wing (2) survived, 1 kill - Totals, Missions 3, 8 GC 2 kills
Pilot Brian - X Wing (1) shot down Killed
Pilot Pop Cicle - X Wing (2) shot down survived 0 kills - Totals, Missions 2,  0GC, 2 kills
Pilot Commander Wayne Kerr - X Wing (2) shot down survived 0 kills - Totals, Missions 2, 0 GC, 0 kills.
Pilot Captain Tangent - A Wing (3), shot down but survived - Totals, Missions 5, 5 GC, 0 kills

Not Present
Pilot Sir Jeremy Dodger - X Wing (2), Not Present - Totals Missions 3, 7 GC, 2 kills
Pilot Twiki Bond - A Wing (1), Not Present - Totals Missions 1, 6 GC, 0 kills

A tough victory for the Rebels, it started off so well with the first container being scanned quickly, I thought the game would be over in two turns, then it all changed, the rebels suddenly seemed to forget what their mission was and started getting all aggressive (not the best idea against 3 Slave 1s). When they did get back on track despite a number of attempts they couldn't roll a hit on a scan action.

In the end as you can see the Rebels lost 5 ships including Rick O'Sheas B Wing (again ! he loses more ships than the Bermuda Triangle that boy,, Jim is not happy !). We also saw the sad demise of Pilot Brian (the only pilot without a stupid name, is that an omen). The pirates were left with 2 Slave 1s both pretty beat up and one each of the Y Wing and Z95s.

Praise for the Rebel pilots for sticking to the Mission and successfully completing it rather than jumping on turn 4.

Bye Bye Brian

Jim head mechanic in the Rebel Garage has a bit of work to catch up with.

Result (2 pts for a win, 1 for a draw)

Rebel win

Campaign overall score is, Empire 8 pts, Rebels 8 pts

And that's all for now folks, Have a great X-mas, X-Wing fans and we'll see you in the new year. The next game will see our intrepid pilots use the intel they gained here against the new Tie Droid MkII.


X Wing - The Campaign - Games 6 and 7 - Secret Weapon and Triumph and Rescue

Game 6 - Secret Weapon

This is a continuation of the X Wing Campaign, full explanation and details of Campaign rules are here , details of Empire force builds are now up on that post as well.


Pilot Upgrades -

Rick O'Shea spent 5 GC on a hull upgrade and a Fire Control System.
Spike Sharpie had a shield upgrade and went up a level to pilot skill 3.
Captain Tangent in true Yarkshire stylee saved his brass
2 New Pilots both choose Y Wings

Mission Briefing

"Brave Rebel Pilots, the Empire have tested a new powerful weapon intended for a new class of "Death" ship, the system completely destroyed a moon in the Vega system when fired. We fortunately had a intel gathering device on the moon and long range scanners inform us that it is still active, jump into the area and engage any Imperial ships whilst our agents recover the device. Beware as there are many pieces of debris and unknown anomalies in the area"

Set Up


Empire ships are 6 Academy Level 1 Ties, a named Tie Interceptor selected at random (it was Lt Lorrir PS5) and Jeff Vader PS4 in his Tie Advanced, all set up range 1 from Empire base edge. Rebel ships start range 1 onto the board (standard 3 x 3). Place 10 Asteroids in the central 1/3 of the table evenly spread.

Special Rules

Asteroid Movement - Move every third turn after the ships, roll 1d12 and use as a clock face, 12 o'clock is the Rebel edge and a d4, 1 = no movement, 2 or 3 use straight 1 movement template and 4 the 2 template, so a roll of 8 and 2 would move an asteroid 1 in the direction of 8 o'clock.

Asteroid Effects - At the start of the game roll 1 d12 for each asteroid which determines the game effects of that token, we marked ours with a different coloured counter (shown in brackets).

1-4 Standard Asteroid, as per normal game rules (small black)
5-6 Ion Storm, All combat through the asteroid is blocked, any ship which ends its turn on the counter gains an ionised counter (yellow)
7-8 Volatile Rock, as a normal asteroid but rolls 2 damage die (blue)
9-10 Gaseous Cloud, All combat is blocked through the asteroid, no other effect.
11-12 Gravity Well, any ship within range 1 at any time in its move, is pulled towards the asteroid on a roll of any hit on an attack die, depending on the ships attitude to the Well it will move 1 step different to the chosen dial move, any illegal moves for a ship type are performed and the ship gains a stress token.
E.g a ship moving towards the well at speed 3 will move at speed 4, away at 3 it will move 2. If it passed on the left of the Well on a straight 3 it will bank 3 left, a bank 3 left will become a 3 tight turns. Tight turning ships become ionised.

Exiting to Hyperspace - To leave the table you need to declare your attempt and then try and gain 2 critical hits, hits from previous rolls carry forward.
Turn 1. Roll 3 attack die
Turn 2. Roll 3 attack die + Pilot Skill / 2 (round up)
Turn 3. Automatically jump

Magnetic Fields - The drifting debris are causing fluctuating magnetic fields effecting target locks, target locks are only effective if they roll a single attack die prior to firing and a hit is rolled.


Victory Conditions

Rebel Victory - Destroy all Empire Fighters
Imperial Victory All Rebel Fighters destroyed or jumped.
Any other result is a draw.
Max 10 turns.


How did we get on

5 Rebel pilots took on the might of the Empire, Rick, Spike, The Captain and two Campaign virgins Rookie Pilots Crank Case and Oi M'Groin ( these names get worse !)

Pilot Rick O'Shea (2) - B Wing, survived, 1 kill - Totals, Missions 6, 3 GC, 4 kills
Pilot Spike Sharpie - X Wing (3), survived, 1 kill - Totals, Missions 6, 0 GC, 4 kills
Pilot Captain Tangent - A Wing (3), shot down but survived - Totals, Missions 5, 5 GC, 0 kills
Pilot Oi M'Groin - Y Wing (1) survived - Totals, Missions 1, 2 GC 0 Kills
Pilot Crank Case - Y Wing (1) survived - Totals, Missions 1, 1GC 0 Kills

Not Present
Pilot Sir Jeremy Dodger - X Wing (2), Not Present - Totals Missions 3, 7 GC, 2 kills
Pilot Twiki Bond - A Wing (1), Not Present - Totals Missions 1, 6 GC, 0 kills

An easy victory for the Empire this time, it was a tall order for the Rebels to destroy the Imperials and they just couldn't hold out for the end of the game, taking survival over mission success after Tangent got cleaned up they jumped.

Jim head mechanic in the Rebel Garage was glad for a spot of work after two games with nowt to do.

Result (2 pts for a win, 1 for a draw)

Empire Victory, Empire 7 pts, Rebels 5 pts


Game 7 - Triumph and Rescue


Pilot Upgrades -

Rick O'Shea saved his brass.
Spike Sharpie after a Customs and Excise audit was found to owe the Galactic Bank 4 GC !
Captain Tangent was a no show.
Crank Case spent his single GC on a R2 Astromech.
Oi M'Groin spent his 2GC on a R10 Astromech (enabling him to jump one turn early, coward !)
We had 3 new pilots all chose X Wings

Mission Briefing

"Gentlemen, we have received a distress call from the CR 90 Triumph, It has lost engine power due to it striking a mine in the Xillow sector, we need you to jump in and protect the Triumph whilst it repairs its engines, look out for mines and may the force be with you"

Set Up


Empire ships are 5 Academy Level 1 Ties and a 2 x named Tie Pilot selected at random (it was Mauler Mithel PS 7 and Night Beast PS 5), plus 2 attack squadrons each with an Imperial Assault Gunboat and a Tie Bomber. The Imperial should have had extra ships see the how did we get on section. You should use 1 gunboat and 1 bomber per 3 rebel players.

Load out for the Bomber and Gunboats are 2 x Concussion Missiles, 2 x Proton Torps, 1 x Proton Bomb, the Gunboats have enhanced ship frame, shield modulator and tractor beam.

Set up roll 1 d4 per group, 1 set up left table edge (as viewed), 2 or 3 Empire Edge, 4 right edge.

Rebel ships start range 1 from the Triumph and roll d4 as above per group with 2 or 3 being Rebel table edge (standard 3 x 3).

Special Rules

Imperial Mines - Place 1 asteroid / mine range 1 from the CR90 at 12, 3, 6 and 9 0'clock, any hit on any ship gives 1 damage and 1 ionisation token.

Imperial Assault Gunboats - Stats as a Shuttle, use the same dial but no 0 move.

CR-90 - Due to its damage the ship doesn't move, however it gains 3 energy per turn. It can take 30 pts of upgrades, but none that effect movement (as it cant !)

Jump to Hyperspace  - To leave the table you need to declare your attempt and then try and gain 2 critical hits, hits from previous rolls carry forward.
Turn 1. Roll 3 attack die
Turn 2. Roll 3 attack die + Pilot Skill / 2 (round up)
Turn 3. Automatically jump

Imperial Target Priority - The assault squadrons must target the CR90, the remaining Imperial ships must target the Rebel fighters unless there are none in arc.


Victory Conditions

Rebel Victory - CR90 survives 8 turns with no sections crippled.
Imperial Victory CR90 ends the game with both sections crippled.
All other results are a draw

How did we get on

Well the campaign is getting a bit popular down t'club, we had 11 players last week ! 
Myself and Steve the stalwart Empire players drafted two new recruits to the dark (or correct) side.

7 Rebel pilots took on the might of the Empire, Rick, Spike, Crank, M'Groin and 3 Rookies

Pilot Rick O'Shea (2) - B Wing, survived, 2 kills - Totals, Missions 7, 12 GC, 6 kills
Pilot Spike Sharpie - X Wing (3), survived, 1 kill - Totals, Missions 7, 1 GC, 5 kills
Pilot Oi M'Groin - Y Wing (1) survived - Totals, Missions 2, 2 GC 0 kills
Pilot Crank Case - Y Wing (1) survived, 1 kill - Totals, Missions 2, 8 GC 1 kills
Pilot Brian - X Wing (1) suvived 2 kills - Totals, Missions 1, 13 GC, 2 kills
Pilot Pop Cicle - X Wing (1) survived 2 kills - Totals, Missions 1,  8GC, 2 kills
Pilot Commander Wayne Kerr - X Wing (1) survived 0 kills - Totals, Missions 1 4 GC, 0 kills.

Not Present
Pilot Captain Tangent - A Wing (3), shot down but survived - Totals, Missions 5, 5 GC, 0 kills
Pilot Sir Jeremy Dodger - X Wing (2), Not Present - Totals Missions 3, 7 GC, 2 kills
Pilot Twiki Bond - A Wing (1), Not Present - Totals Missions 1, 6 GC, 0 kills

An easy victory for the rebels this time, as you can probably tell from the kills above. It all went a bit Pete Tong for two reasons, it looked a bit one sided towards the Empire at the start but I forgot to factor in that the assault squadrons could only fire at the CR90 thereby drastically reducing the firepower of the dark side. I therefore didn't add any special ships into the Empire fighter force so it turned into a bit of a turkey shoot for the Rebels (Empire should have had another 3 none Tie Ships).

Add to that we got the huge ship rules wrong, we started on the first turn by forgetting that the CR90 had an action per ship half and it nearly got shot down, then we gave it too many actions so that it became impossible to destroy. I'd be interested to see how others get on with this scenario, I think you would need at least 6 rebel players to get it to work as one assault sqn (Gunboat and Bomber) wouldn't be enough to have a chance against the CR90.

I have declared the match a draw due to the mistakes above.

Jim head mechanic in the Rebel Garage is advertising for an assistant mechanic !

Result (2 pts for a win, 1 for a draw)

Draw, Empire 8 pts, Rebels 6 pts

And that's all for now folks, Game 8 tonight and then a break for Xmas

As the CR90 wasn't moving we let stuff fly under it which looked great.


Wednesday 17 December 2014

28mm AWI New Unit - 55th Foot and Brigade Review

Project 2014 complete !


More of a personal post this week after a lot of game AAR posts and box to table tutorials. Presented here is my last Perry Miniatures 28mm plastic British battalion the 55th Foot. 20 figures based in 4s on the elongated bases to protect the plastic muskets as discussed in previous posts. The staging of Guilford Court House (see previous post and upcoming AAR) did the trick and put the enthusiasm engine into top gear to get these done. The how to tutorial on these is here.

Command section close up

I always try and get an individual feel to each base and use casualty figures to do this


Also finished at the same time as this unit is the main man of the Brigade, Brig James Grant. There is a definite lack of mounted British Colonels around and I have used one of the French mounted figs from the Perry range and painted him up in British colours, it works for me.


And finally....... Roll of Drums........ The completed brigade !!!!


In the front we have the new battalion the 55th, the next line is the 5th and 27th Foot with the 40th and 22nd (see that post as to why its in that battalion is in this brigade) in the third line, 97 figs in total. I'm very happy with the way these have turned out.


So that was my project for the year and unbelievably I finished it, there were WW2 and SCW distractions along the way, but we got there in the end. Many thanks to those who have followed the brigades progress and your kind comments along the way. Doing this blog has definitely helped me stay focused on getting this project finished this year, Yarkshire Gamer will be a year old in Feb 2015 and the enthusiasm to update with new content and articles remains strong. I have three posts on the back burner at the moment, the Guilford House AAR, a X Wing Campaign update and a Box to Table on AWI British Artillery.


Next years project will be 28mm Ancients, Punic Wars stylee, I have been buying a unit a show for about 5 years and have loads lying around. The target will be 12 units, a unit being 24 foot, 12 cav or 3 chariots. It will already be distracted by WW2 vehicles, SCW and some 15mm Seven Years War I have promised myself to get done. 28mm Italian Wars is calling but I am resisting.

Sunday 7 December 2014

AWI - Battle of Guilford Court House 1781 - Scenario

A 28mm game using British Grenadier

The Brits advance towards the first line of defence
When it came to set up the next game for our little bunch of tabletop warriors once again work life and the real world limited my prep time, so I needed something quick to set up, which required little research or preparation.

The AWI rules are fairly fresh in my mind after the big game earlier in the year and the figs always look nice on the table so period was quite easy, however which game to go for ? Historical Scenario or made up game action ?

Is it AWI or Pirates ?
A quick flick through my background material and Guilford Court House jumped out of the pages. Its a classic action of the period, high quality British troops battling their way through increasingly difficult lines of defence. Added to that the fact that I had never tried the battle (I'm quite new to AWI). I also have a personal motive, regular followers will know my painting project for the year is a 28mm brigade of Brits, which I am close to finishing, what better than a good old game of British Grenadier to get the Vallejo juices flowing.

Waiting
Historical Background

Cornwallis, the British Commander set his army off across North Carolina hot on the tail of Nathaniel Greene and his men, Cornwallis was after a quick victory , he could ill afford Greene gathering more forces which were already preparing in Virginia, a decisive action in the early part of 1781 was delayed by Greene for this reason.

After receiving some more troops Greene, after a couple of days of manoeuvre around the surrounding area set up his army in a strong defensive position of three successive lines, outnumbering the British by about 2 to 1, Cornwallis could have turned away, he didn't and took on the Americans.

The 33rd Foot begin the advance
Terrain


 The set up we used is shown above (still haven't got the hang of a map app). The Brits move on table and advance towards the first line of Americans who are set up behind a fence line, the second line are set up behind a central line of woods with the left flank ( as viewed above ) on a hill. The final line can be seen in the distance set up on the last hill with the court house to its right.

For rules purposes (British Grenadier) we determined that crossing the fences would add 1DP and the woods 1DP per dice movement.

The British


 A quick note before our orbat. I have listed the troops we have used, the orbat for the game is readily available but very rarely will you find two the same. Our orbat is as close to the day as we could get. The main limiting factors being 1) I don't have any AWI Cavalry finished as yet 2) All our close order stuff is based in 4s therefore unit sizes have to be 12, 16, 20, 24 etc

C in C Cornwallis Graded Excellent

Websters Brigade (Excellent)
33rd Foot 24 Figs Elite
23rd Foot 24 Figs Elite
Guard Elite Coys 16 Figs Elite
Hessian Jager 8 Figs Line Skirmishers

Leslies Brigade (Average)
71st Foot Highlanders 24 Figs Elite
IR Von Bose Hessian 32 Figs Ave
Light Coys 6 Figures Line Skirmishers
British Artillery 2 x 3pr guns

O'Haras Brigade (Ave)
1st Guards 16 Figs Elite
2nd Guards 16 Figs Elite

Light Coys 6 Figs Line Skirmishers
British Artillery 1 x 6pdr


Set up with Webster on the left, Leslie on the right with O Hara bringing up the rear.

 American Forces


Again with the American figs we had no cavalry available.

C in C Greene Graded Excellent

Butlers Brigade (Ave)
Orange County Militia 24 Figs Militia
Caswell County Militia 16 Figs Militia
Granville Lt Coys 12 Figs Militia Skirmishers
Singletons Artillery 1 x 6pdr 2nd Line

Eatons Brigade (Ave)
Warren County Militia 16 Figs Militia
Franklin County Militia 16 Figs Militia
Lintons Regt 20 Figs Militia

This is the first line set up on the fence line with Eaton on the left as viewed in the set up photo


Stephens Brigade (Ave)
Pitsylvannia Militia 16 Figs Militia
Augusta Militia 24 Figs Militia
Cockes Militia 20 Figs Militia
Virginia Lt Coys 12 Figs 2nd Line Skirmishers

Lawsons Brigade (Ave)
Randolphs Militia 24 Figs Militia
Holcombes Militia 24 Figs Militia
Delaware Lt Coys 12 Figs 2nd Line Skirmishers

This is the second line with Lawson on the left (as viewed) on the hill and Stephens behind the woods on the right.


Williams Brigade (Ave)
1st Maryland 24 Figs Line
1 / 2nd Maryland 20 Figs Line
2 / 2nd Maryland 20 Figs Line
Finlays Artillery 1 x 6pdr 2nd Line

Hugers Brigade (Ave)
1 / 1st Virginia Cont 20 Figs Line
2 / 1st Virginia Cont 20 Figs Line
2 / 2nd Virginia Cont 20 Figs 2nd Line


The good stuff underneath the crusty top ! The Continental Regts set up on the final hill, the Maryland troops around the court house and the Virginias closest to the camera.

The Brits objective is to beat all three lines of defence whilst the Americans are looking to hold the Brits at their third line. I'll post an AAR when we get the game finished.

Thanks for reading my version of this classic game, looks like I'm buying some Cavalry in the new year.